Kat Eye Studio

  • Home
  • Portfolio
  • Books
    • Art with an iPhone
    • Digital Photography for Beginners
  • Workshops
    • Mobile Photography Workshop Series
    • iPhone Art Workshop
    • Out of the Box Composition Workshop
    • Photography & Creativity Talks
  • Free Resources
    • Mobile Tutorials
    • Exploring with a Camera
    • Liberate Your Art Postcard Swap
  • Blog
  • About
    • Artist Statement
    • Background & Experience
    • Contact

January 4, 2011 by Kat

Lessons from Abroad: Find a Regular Practice

Lessons from Abroad: Find a Regular Practice

[Today’s post is the second part of a five part series. The first article was published here.]

In the last post I talked about how changing up your schedule can help free up your creative energy to find your purpose and passion. Today I’m going to explore the next key element I’ve learned during my time in Italy: Find a Regular Practice.

In many personal development books I’ve read, the idea of a “daily practice” is somehow incorporated. One of the first ones I encountered was in Julia Cameron’s The Artist’s Way, where the “morning pages” are a crucial part of her process. Over time I’ve noticed almost every personal growth or spiritual philosophy incorporates and encourages some form of contemplative activity on a regular basis.

I have started and stopped different daily practices depending on the books I’m reading or the programs I’m following. Over time though, with trial and error, I have settled in to three main things that work for me as part of a regular practice: Inspirational reading, journaling and walking. These three items are complementary and work together for me to keep me balanced and centered, as well as open and ready to receive ideas. They help keep me in touch with my intuition and those messages from my authentic self.

I don’t have a regimented schedule with my practice. In fact, that’s why I say “regular practice” and not “daily practice” in the title. Here’s what my practice looks like:

Most mornings of the week I will get up and get my cup of tea (I guess we can add “tea” in as part of the practice), and then sit down to read something that I’m interested in. This is not fiction reading – it could be essays, part of a book on creativity, something on personal development. I have a number of books in progress sitting next to me, and I’ll pick up whichever one strikes me. I read a few pages and then I journal for a little while. Sometimes the journaling is on what I’ve read, sometimes it is on a problem that is on my mind, sometimes it’s just random ideas I want to capture. Once I start to write, I write until I feel done. That could be one paragraph or several pages, depending on what’s coming. Later in the morning (that morning creative time I talked about before!) I will often go for a walk or jog, with no music to distract me, in the park near my home.

I don’t do all of these every day – in fact most mornings I do 1 or 2 of the 3 – but over time I engage regularly in all of these activities.

This group of practices combine in an amazing way for me. It’s as if I get creative fuel, raw ideas, from the reading. The journaling helps me clear out the blockages in my brain and my emotions from daily life, which creates the space in myself for new ideas to be generated. With that open space and creative fuel available, the walk becomes where I receive the resulting messages and ideas. Sometimes the reading sparks an idea that I subsequently write about in my journal, which leads to making a connection or discovery about myself. Sometimes something I’ve written about in my journal or something I’ve read will sit in my mind and I’ll mull it over, and it comes out as some new idea during a walk – possibly days later. It is amazing how many creative ideas, how many realizations that have led me to my passion and purpose, have come to me during these walks. I now keep a small notebook with me at all times, just to capture the ideas.

I also find, in the process of all of this amazing idea generation and self discovery, I gain perspective on my life in general. I’m able to let go of the damaging focus on stressful situations. I am able to disconnect from the things that previously would wrap me up – preventing sleep, contributing to bad moods, generally coloring my life negatively. I can see problems with a new view.

There is nothing new in the ideas of a regular practice, or the activities that comprise my practice. As mentioned above, many personal or spiritual development programs have incorporated these elements, time and time again. They all have a plan – if you do it this way, on this frequency, you will reap these rewards. While that is probably true for the creator or author of the program, I think part of this key is that each of us has to find what works for us. If we follow a regimented plan that doesn’t really connect with us, even if we see some initial benefit we won’t sustain it long term.

One of the most important elements of defining a practice is occasionally losing the practice – falling off the wagon, stopping it, letting it dribble away. It may seem counter-intuitive, but these are actually very important occasions for really integrating and owning your own practice. It’s through the losing of it, and seeing the results of losing it in our selves – how we feel, how we interact, how it affects our lives – that we become truly committed. For me, it’s taken time – starting and stopping and restarting again – to finally come to the point that I learn to choose the practice over the other things that compete for my time.

That’s not to say that I don’t skip it sometimes for an extended period. Vacations, business trips, certain busy times come along for a week or two. But during these times I know they are coming, consciously prepare myself and make the choice to skip it, and then make the choice to come back to it when that brief time is over. I’ve found that for me, a week or so of skipping isn’t damaging. I can remain centered and grounded and can come back to it. Beyond two weeks, however, and I start to lose some essential pieces of myself, my connection to my core. I now recognize this change and am not willing to lose my practice anymore. It’s a wonderful feeling – to make the choice based on what’s best for me.

Here are my ideas about how you can apply this key concept of “Find a Regular Practice” to your life too:

  • Start experimenting with some different practices. These could be similar to mine, or they could be other practices like running, yoga, meditating, creating art, etc. You might already have something that you’ve started and stopped over time.
  • When you find one that makes you feel good – when you are done you feel refreshed, revived, centered, clear – stick with that one for a while. Note how you feel when you do it, and when you don’t do it. Experiment with different times of the day, tap into the peak of your energy cycle as discussed in Change up Your Schedule for maximum impact.
  • Start with one practice at a time, don’t go overboard trying to start two or three new things. You will probably give them all up if you do that! My practice has evolved over time to these three, but I didn’t start out with all three. I started with the journaling, eventually added the reading and latest the walking. I’ve done them all off and on but have recognized over time how they work together.
  • Don’t follow someone else’s regimented schedule. Maybe start out with suggestions, but experiment, shift, tailor your practice to yourself. We all have different needs, consider any defined practices a starting place. It’s like a buffet, you get to pick and choose what you want to incorporate into your life. There will be people who swear by their schedule, their program – because it works for them. Remember you have to find what works for you.
  • When you have let the practice go, and realize that you have let extraordinary circumstances or even everyday life run you over, be kind to yourself. Notice how you feel without it, contrast that with how you felt when you were regularly practicing. Decide if the practice is something you want in your life or not, if it’s worth it to you to make the changes to incorporate the practice as a regular part of your schedule. It’s a choice, it’s up to you. Don’t judge yourself or place unnecessary rules on yourself, be honest and true to the answers you find within.

When you do these things, when you find a regular practice that truly works for you, I can guarantee you won’t want to let it go. The connection that you gain to your true self, your center, becomes vital. The clarity that you will find, the ability to be open and listen to what your authentic self has to say, will help you to discover your passion and purpose better than any other prescribed method around.

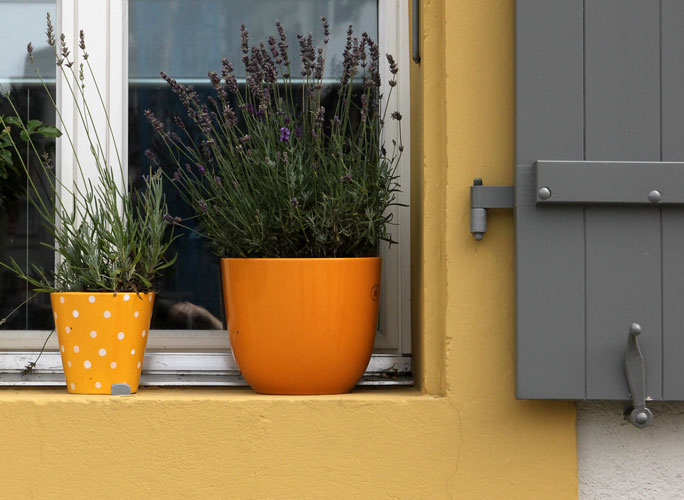
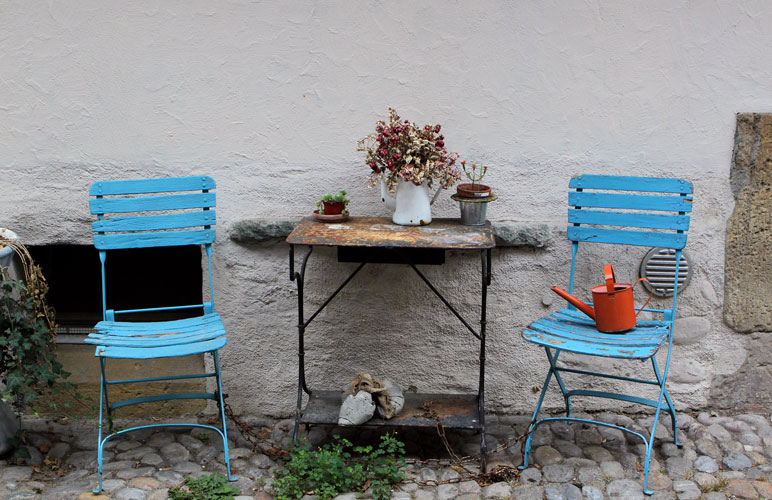
(Photo is from Murten, Switzerland)

Filed Under: The Kat Eye View of the World Tagged With: flowers, Lessons from Abroad, Murten, pot, Switzerland, window

October 21, 2010 by Kat

Exploring with a Camera: Rain


With the change in seasons, in the places I’ve lived the last 12 years or so, we wave good-bye to the consistently sunny days and welcome the wet. Rain will be a consistent part of life for the next few months as winter comes on, with the occasional break in the monotony for snow or sun when we’re lucky. A rainy day is a great time to curl up under a blanket, with a book and a cup of tea. It is also a great time to get out and photograph!


A while ago I wrote a blog post that said when life gives you rain, you should take photos anyway. Today let’s explore the ways to capture the beauty to be found in the rain…


The light is completely different in the rain. First off, it’s usually cloudy during the day, which provides softer, indirect light. Second, the wet surfaces reflect the light in completely different ways than dry surfaces. The photo at the top of the post is a good example of this – the leaf and the stones are highlighted by the reflections of the light. What would be an interesting composition for it’s contrast when dry, gains even more interest for the way the individual elements stand out from the light on the water.


This photo from Orvieto, Italy is a daytime example of how the wet ground reflects the light, drawing your focus along the ground from the bright doorway in the top left down toward the scooter in the bottom right.
The wet ground in this photo of Bath, England at night serves to contrast and highlight the row of benches along the sidewalk. As I mentioned in my Exploring with a Camera post on Night Photography, wet surfaces at night can add much needed light for taking photos at night.

Not only is the light reflected, but you can great image reflections as well with a smooth surface or a puddle. The thin layer of water on this smooth concrete makes a wonderful mirror for the leaves on the ground.

This puddle in Piazza San Marco in Venice serves to reflect the geometry of the famous tables and chairs, making a more interesting composition than the tables and chairs alone.

And while we’re talking about puddles, how about capturing some splashing through them? Of course, this image is a bit more sedate than most puddle-splashing pictures, a capture of Italian rain fashion more than splashing but you get the idea. The movement of water in the puddle along with the reflections makes the photo more than just photo of rainboots.

Out in the rain, look for ways the water moves across and off surfaces. This restaurant table was so highly polished that the rain water beaded up into interesting shapes, a nice backdrop for the flowers.

Look for the drips ready to fall…

Look for the drops that grace the leaves.

It’s also fun to capture people in the rain. They are more “anonymous” with their hoods and umbrellas, hunched up and hurrying along. I like to capture groups of colorful umbrellas, as on this bridge in Lucerne, Switzerland.

Or the lone traveller, trying to get someplace at night in Venice. People with umbrellas are quite the artistic staple, if you look at paintings through history.

Here we have quite a few different elements that I love in one rainy shot… umbrellas, multiple reflections, at night, and it’s Venice. How could you go wrong?

There are so many ways I have yet to capture the rain, these are the images I’m still looking for:

  • Looking out of a window covered in raindrops. Focus on the drops, with the scenery out of focus behind.
  • Rain spilling out of our very cool dragon-shaped rainspout or off the edges of eaves.
  • The rain in a downpour – I want to figure out how to capture the “look” of the world when you look through rain.
  • Drops of rain splashing in puddles – oh those perfect, rippling circles just tantalize me!

So, how do you do shoot in the rain without ruining your camera? Here are a few tips:

  1. Use an umbrella. If you have someone along with you, ask them to hold it over you and your camera when you shoot. If you don’t have that option (or don’t want to ask your companions to hold your umbrella every 15 seconds), a bigger umbrella works better than a small one for this “solo” technique: Rest the handle between your neck and shoulder with the umbrella resting on the top of your head. This will enable both hands to be free and your camera to be covered while you shoot. It does take some practice though!
  2. Find sheltering spots. Store awnings and overhangs, doorways, under trees, etc. can be great places to pause and have a little bit of protection from the rain while you shoot. Watch out under trees though – the drops might be less frequent but they are often bigger!
  3. Keep your camera protected between shots. Work out a system that enables you to quickly and easily but your camera in and out of your bag. I carry my camera across my body, and my camera bag the same way. I can take my camera in and out of my bag easily, so when it’s rainy I can put it away between shots but easily get it out for the next one. Another thing I will sometimes do, especially when it’s light rain, is just tuck the camera between my body and the bag. It’s mostly protected but easily accessible. When it’s heavier rain though, I keep it in the bag!
  4. Use a camera cover. You can buy rain covers for your camera, but I’ve found them to be kind of pricey and I don’t want something bulky I have to carry around “just in case” it rains. Another practically free alternative for an SLR camera is to use a plastic grocery bag (you know, the ones you get in just about any grocery store) and a rubber band. Tear a hole at the bottom of the bag near one corner, this is where you put the lens looking out. Use the rubber band to secure the bag at the end of your lens, then just wrap the bag up around the camera with the handles coming around the back. When you want to shoot, just open up the handles and hold the camera as normal inside the bag. It might look weird, but it’s cheap and easy, and a spare bag wrapped up with a rubber band does not take up much space in your camera bag.
  5. Don’t worry about a few drops of water on your camera. I don’t. A few drops on my equipment have never hurt anything – I just make sure that it doesn’t get completely wet. By keeping the camera mostly protected in the ways I’ve described above, my equipment has remained in good working order even if I shoot in rainy weather. Keep something soft and dry handy to wipe off the lens though, you will experience drips now and again!

Whatever you do – don’t just put the camera away when the clouds start rolling in. Enjoy the different photo opportunities that the rain provides.

Remember this motto – “When life gives you rain, take photos anyway!”

Filed Under: Exploring with a Camera, The Kat Eye View of the World Tagged With: Bath, England, Italy, Lucerne, Oregon, rain, Switzerland, umbrella, Venice

September 23, 2010 by Kat

Exploring with a Camera: Night Photography

Welcome to the last day of Six Days of Night! If you don’t have the bug to try night photography after this week, then I’m not sure I’ll be able to convince you. But if you do have the desire to try it out for yourself, today I have some information that will help get you started.

I discovered night photography about a year ago, in October 2009, on a trip to Florence and Tuscany. I’d taken the odd night photo here and there before this, and some even came out great, but it wasn’t until we began travelling in the winter months last year that I really fell in love with it. When you travel in the summer, you have these long days to run around and see everything. By the time the evening comes along, everyone is worn out and you head back to the hotel room as the light fades, especially if you have kids. In the winter, however, the days end early and you find yourself out and about in the darkness, seeing the world in a totally different light. Amazing, beautiful, atmospheric light that is like no other. And just like the quality of light in the daytime, which changes from place to place, the quality of light and atmosphere of places at night changes too. You’ve probably noticed that in the photos I’ve shared over the last few days.  The photo above is one of my first attempts at night photography, in Florence.

My definition of “night photography” covers a broad range of light. As soon as the sun goes down and the lights start coming on, to me that begins the night. This is the time that the flash would start automatically coming on in your camera or you might just put it away, if you are used to using natural light.

Let’s look at how light progresses from day to evening. This image of London is from very early evening. You can see that the sky is still quite light, but the phone booth is lit, the streetlights are on and the windows are starting to glow with light. There is still a lot of light at this time for your photos, but you start to get the warm glow that makes night photos something special.

The transition from day to night is called twilight or also the “blue hour” because you see the sky transition through a wonderful range of blue. The contrast of this blue sky with the warm yellow of artificial lights is especially pleasing, as in this photo from early evening in Split, Croatia.

Toward the end of the  “blue hour,” the skies are an amazing deep blue, as in the photo below taken the same evening in Split, just later. The blue also changes as you look toward the west, where the sun just went down, versus toward the east. You can see the variation in blue in the sky of this image below, from bottom right to top left. I can’t image a prettier blue color! No color adjustments done to this at all.

After a while, you will find yourself in full night, where the background skies are black. This has a completely different feel in the photo, all illumination is from the artifical lights around, as in this photo of Piazza San Marco in Venice.

Guess what? The blue hour happens twice a day, before dawn and after sunset. There is a great website, bluehoursite.com, that gives you the times of the blue hour for anywhere in the world on any day, so you can plan ahead!

Now that we’ve talked about light, let’s talk about how to use it creatively at night. There are so many ways to photograph the night! Looking through my photos last week I came up with lots of ideas. To start off, you know that reflections are one of my favorite things, whether the smooth as glass reflection of my favorite Venice photo (I had to slip this one in!), or the ripples of the bay in Split.

Reflections don’t only come from a large body of water at night as I’ve shown above. The pavement of the sidewalk, streets, rain… at night there are unending sources of light reflections. Not only are they cool to capture, but they increase the light available for taking photographs. Keep your eye out for them! We had a rainy night during our visit to Bath, and the reflections were so interesting. The really highlight the stone walkways and streets.

You might also note how yellow the light looks in the above photo, I did not do any adjustments to white balance to change how it came out in the camera. In my night shots I like the yellow glow of the lights, because that is part of the feel of night for me, although sometimes I do tone it down just a bit. You have to be careful when you adjust white balance on a night shot, because you can make the image look weird. The image below is an example. Left is out of the camera (quite yellow), Center is the color correction I like (still slightly yellow), and Right is over-corrected (no yellow left at all). While the flowers are white in the right one, that adjustment ends up creating an overall blue cast to the photo, and it no longer looks quite like night.

Night is a time for wonderful light bokeh. Since you often need to shoot with a wide open aperture to keep shutter speed down, you can capture the bokeh of lights in the background. This photo of the Chapel Bridge and the Lucerne water front is a good example. Since I’ve focused close to me, on the bridge, the waterfront behind is out of focus with nice bokeh. I’ve decided that I don’t use this effect enough, I need to play with it more in my night shots.

Watch for light pools or effects. Some of the paned windows in York provided wonderful shapes of light on the ground. I would love to go back and focus some shots just on those!

Night is also a wonderful time for silhouettes. Either from the fading light of twilight, or an artificial light source. The silhouette of the person walking by the bookstore in Padua, in the shot below, gives interest to the colorful background. And the strong light coming out the store front made this easy to get.

Strong light can also create shadows, sometimes in multiple directions at once if there are multiple light sources, like in this photo of my son’s legs and feet. Pretty cool! You don’t see this in the day, since we only have one sun. 🙂

Another great thing to capture at night is motion – in the form of blur. Because of the longer exposures you need, moving things will be blurred in your frame if the camera is still. You can also try to capture a moving object as still, with the background blurred to show motion, if you pan along with the moving object. This takes a lot of practice and trial and error. I don’t have any great examples of this, although I’ve tried, but the photo below from Venice shows the idea. I was on a moving boat, trying to get the bridge over the canal still while the rest of the photo was blurred. More practice is obviously needed, but hopefully you get the idea.

Sometimes, when you have just gone beyond the limits of any clear, in focus shot, just play. The photo below is from that same Vaporetto ride in Venice. Since I was moving on the boat, I played around with longer shutter speeds and intentionally moved the camera to get some cool effects. Kind of neat how the background buildings are still clear and “still” while the bright lights are moving – completely unplanned.

And finally, don’t be afraid of the dark. This is night, you can have large areas of your photo completely black and still have an amazing photo. Throw away the idea of the the entire frame being exposed when you are shooting at night, and just go for your focal point. It can create a dramatic image, like this one, another all-time favorite of mine from Venice.

My main mode of operation is to handhold my camera for night shots. I just am not willing to haul a tripod around with me all day so that I can have it handy at night, so big and cumbersome. So I’ve learned quite a bit along with way that I can share with you for optimizing your ability to get good “Handheld” night shots. (By the way, these will work in any low light situation, such as indoors, not just as night.) Tips for “Handheld” night shots:

  1. First off, turn off your flash! Turn your camera to a mode that won’t allow the flash to come on.
  2. Camera shake is your biggest enemy here – just the movement of you holding the camera while the shutter is open. A rule of thumb to avoid camera shake is that the shutter speed should be no slower than 1/[Your zoom setting]. So if you are at 50mm zoom, your shutter speed shouldn’t go below 1/50. At 35mm, shutter speed of 1/30.
  3. Increase your stability by taking a wide stance with your feet, tucking your elbows tight into your sides, and hold your breath while you take the shot. I can sometimes get good shots down to 1/20 or 1/15 with this method. You can also lean against a pole or the side of a building for increased stability.
  4. You can also increase your stability with an “assisted handhold” – use anything stable around, like a railing or bench or fence, and use that to help hold your camera. I put my hand under the lens, spreading my fingers and moving them around, to support the camera with the right angle. I also have to plan for more straightening and cropping in these shots, because you don’t have as much control. Most of my Venice canal shots were done with the assitance of a bridge railing for stability. Another option that is less cumbersome than a tripod but provides more stability is a monopod.
  5. Set your camera on Aperture Priority, with the setting as wide open as it will go. This will help keep your shutter speeds as fast as possible.
  6. Or, set your camera on Shutter Priority, to a reasonable shutter speed. I often do this to set it at 1/50 when we are just walking around a town. I’ve found that this setting works consistently well for avoiding camera shake on the go, and it forces the camera to choose the best aperture for the exposure. This works when my camera is choosing slower shutter speeds but not using the full aperture range of my lens.
  7. My last resort is to bump up my ISO setting. This is one of the most wonderful things about digital, that we can adjust our ISO setting, instead of being stuck with whatever is set for the film that is loaded. When you’re wide open on aperture and your shutter speed is still too low, then increase the ISO setting. I kind of think of ISO increase as a last resort, because with every increase to ISO you also increase the noise. I purchased my current camera (Canon Rebel T1i) partially because of the increased ISO range, 3200 and beyond, but the more I’ve gotten into night photography the more I realize that I would rather not use the ISO settings higher than 800 if I can avoid it. But – when faced with either not getting the shot or having a noisier shot – I’ll always choose to get the shot, even with the noise.
  8. If all else fails, underexpose. By underexposing, you can drive your camera to shorter shutter speeds. As long as you don’t underexpose so much that you lose the vital pixel information of your focal point, you can compensate exposure in the computer using software.  I’ve learned that I can easily underexpose 2/3 to 1 full stop on night photos and recover them in post processing.
  9. Constantly check your settings, especially shutter speed, if your camera is in an auto mode for exposure. You have to be aware of them as you shoot at night, even more so than you might normally, because the lighting conditions change so much from place to place.
  10. Always take multiple shots, because with several you might get one that one perfect one. There is a lot more room for error with night photography. And happy accidents too! Review in camera using the zoom feature, because sometimes a shot might look perfect on your tiny screen only to have some camera shake when you view it larger on your computer.
  11. Finally, if you just reach the limits of your equipment and don’t want to go the tripod route, there is nothing that can help your handheld night photography more than upgrading your equipment for a lens with a wide aperture. Night photography is one area where your equipment really does come into play a bit more, so you will have to experiment and find the limits of your camera/lens combo.When night comes, I switch to my 35mm f/1.4 lens. This has given me an extended range of light I can work with at night. Consider trying out a 50mm f/1.8 lens as an inexpensive first step into this arena, if you have a dSLR. And if you have a point-and-shoot, well… you might want to think about a dSLR or use a tripod.

As I’ve progressed further with night photography, and especially after my photo lesson in Paris, I can really see the benefit of the tripod. You can decrease your ISO and increase your shutter speeds significantly and take your camera limitations mostly out of the equation. The cost of it is carrying the tripod, so for me, I see this as an option when I am intentionally travelling to photograph rather than when I photograph as I travel (the latter is my normal mode of operation). Tips for “Tripod” shots:

  1. You need a good stable tripod that will not move with normal winds and can hold your camera. My 24-70mm lens is a big one and so most of those little, compact tripods you can buy won’t work for my camera. Also recommended with a tripod are a quick release feature (where you don’t actually screw the camera into the tripod, but into a piece that you can easily connect and disconnect from the tripod) and a level that can help you keep your camera straight (something I need!). There are multiple types of adjustments available, but you want to make sure that you can do both horizontal and vertical orientation easily. There are so many types of tripods out there, if you can visit a store and try them out with your camera before you buy, that is recommended. I have a simple tripod that is strong enough to hold my camera stably, has quick release, but is as light as I could manage.
  2. Ensure flash is off.
  3. Set your ISO lower, to reduce noise. Try as low as the camera will allow you to set it, and work up from there as needed.
  4. You have more flexibility in your aperture and shutter speed settings, so play around here. You might still want to set your aperture wide open, to reduce the shutter speed, just to avoid really long exposures you will need for a low ISO setting. You are still subject to camera shake with a tripod, just less so. The longer the shutter is open, the more likely you are to have an issue.
  5. Use a remote shutter release. You can still shake the camera on a tripod just by pressing the shutter. Remote shutter releases (cable or wireless) are available inexpensively for many cameras. This removes you completely as the source of the camera shake.
  6. Use your camera self timer. Another option, if you don’t have a remote shutter release, is to use the self timer feature that most cameras have these days. This doesn’t work so well, however, if you are trying to time the shot with movement in or out of the frame. For example, in many of my Paris shots, I had to be ready to shoot as soon as my frame was clear of people. If I used the self timer, I could never have been able to hit the shutter such that 10 seconds later the frame was clear.
  7. Again, review, check your settings and take multiple shots. Once you get everything set up perfectly, you don’t want to be disappointed if you discover on the computer that it was slightly out of focus. It’s hard to use manual focus at night, so I use auto focus as much as possible but that isn’t always fool proof either.

If you stuck with me here to the bitter end you must be ready to start exploring night photography. And guess what – here in the northern hemisphere the days are getting shorter and the nights longer, so you’ll have plenty of opportunities in the coming months. The Flickr group is available to post your shots, but I think I’m also going to mix it up a little bit to see if I can increase the sharing. Next week come back on Thursday and you can add a link to your night shots (blog or website or Flickr, anywhere with a web address to your specific shots) to share with the rest of the readers here too. Won’t it be fun to go blog hopping and see what everyone else has captured in the night? I can’t wait to see your view!

Filed Under: Exploring with a Camera, The Kat Eye View of the World Tagged With: Bath, blue hour, Croatia, England, evening, Florence, Italy, London, Lucerne, night, photography, reflection, six days of night, Split, Switzerland, Venice, York

September 20, 2010 by Kat

Six Days of Night: Lucerne

Night is a wonderful time to catch little details, illuminated with soft light. In wandering around Lucerne one evening, I saw this waterfront restaurant, tables set up for the night. Candlelight is a wonderful source of nighttime illumination. A simple candle on a table transforms the scene, giving warmth to the black and white color scheme.

Reflections of light in water are also one of my favorite things at night, I am always drawn to town waterfronts. It seems many people are too, as waterfronts are often places lined with restaurants and benches, foot bridges and plazas. The chapel bridge in Lucerne is fun to photograph any time of day, with it’s long lines, flowers and repeating patterns. But at night, add in the reflected light in the water and it is something special. In this image, I like how the blue of the sky is reflected in the water, giving an overall blue contrast for the lights.

Are you enjoying the “Six Days of Night” so far? I am! I can’t believe we’re already halfway through. I wonder what town will be next? Join me tomorrow to find out!

Filed Under: The Kat Eye View of the World Tagged With: bridge, cafe, Lucerne, night, reflection, river, six days of night, Switzerland, table

September 8, 2010 by Kat

Real Life Still Life

Everyday, we walk by countless places that people live in, work in, shop in, play in. We don’t even see these places most of the time, they are just part of the background noise of our every day lives. The good thing about travel is that it makes you more aware of what’s around you, you are open, receptive and seeking. You are actively seeing what is someone else’s background noise, what they don’t even notice anymore. The little details of real life that are fantastic still life compositions, if we just notice them.

This real life still life was found in a back alley in Murten, Switzerland. My son and I were wandering around the town on our guidebook walking tour, and I caught this flash of blue in the corner of my eye. Not one to miss out on a possible color photo opportunity, we headed down the alley to investigate and found this wonderful little place, where someone had clearly set this scene up with artistic intent. I loved taking pictures here, but this is my favorite of them all, because it just shows the whole scene as created by the artist.

How many people do you think see this, being tucked into a back alley? How many of those people don’t even notice it anymore, as part of the background noise in their everday life? It’s a good thought to ponder as we go through our everyday. See if you can find a real life still life, accidental or intentional, in your background noise. You don’t have to take a picture, just notice it. It takes active looking, an awareness that requires to you be in the moment. You can’t be thinking about where you are going, what tasks you need to get done next.

I think you might find it a refreshing, positive experience. And you may find you enjoy the places you go, the things you see every day, just a little bit more. Let me know how it goes.

+ + + + + + +
So excited, today is my first post over at Mortal Muses! We are currently musing on Reflections. You all know that’s a favorite subject of mine. 🙂  And come back tomorrow for a new Exploring with a Camera –  I can’t wait to share it with you! It’s a good week, all around.

Filed Under: The Kat Eye View of the World Tagged With: alley, blue, chair, Murten, orange, still life, Switzerland, table

August 19, 2010 by Kat

Exploring with a Camera: Repeating Patterns

Time for another exploration! Can I tell you how much I look forward to these? I have been thinking about this post for the last two weeks, pondering today’s topic and seeing things in the world around me with an eye to Repeating Patterns.

We have repeating patterns everywhere in our lives. So much so that we don’t always notice them. We see, catalog, and sort the differences in things, that’s how our brains work. The sameness can blend in to the background. But, when we notice, we can use the “sameness” of patterns to good effect in our photography.

First, let’s explore repeating patterns as the focal point of our images. In the photo below, of a Barcelona apartment building, at first glance it might look like a photo of windows. It’s not. It’s a photo of a repeating pattern – the windows, balconies and shadows all repeat in a regular fashion. There’s no one place for the eye to look. I’ve heightened the “pattern” aspect of the photo by changing it to black and white. No pesky color to distract you from the pattern. The image becomes more about the pattern of light and dark, than what is creating the pattern of light and dark. I especially like the undulating light “stripes” that appear, where the sunlight hits the building, when you stop looking at the windows and shadows and just look at it as a pattern.


    Here’s another image that is of repeating pattern, of a rooftop in Murten, Switzerland. You see the shingles, all repeating at regular intervals vertically and horizontally. There is a difference in this photo, however, from the image above. In this photo, the repeating pattern serves to highlight another aspect – the fact that the shingles are different. The pattern repeats, but what makes up the pattern does not, so this image is about the differences. Differences in color, size, shape. You notice them all more because of the pattern.

    In thinking about repeating patterns and how I use them in my photography, I find that this second use, using a repeating pattern to highlight some third aspect, is my primary use. This image of shadows on the street in Bolzano, Italy is a good example. Imagine the image of the shadows without the contrast of the pattern, or the pattern without the shadows. Either way, in my mind’s eye, it falls flat. But when you combine the two, and use the repeating lines and shapes of the pattern as a backdrop for the irregular and solid shapes of the shadows, you get a great image. The repeating pattern really sets off the subject, the shadows. Again, in this image I converted to black and white to highlight the lines, shapes, patterns.

    The pattern of the edges of the floor tiles, of this Gaudi design in Barcelona, serves to contrast and enhance the flowing nature of the art that is impressed into them. The angle of the photo, with the pattern growing smaller and blurring toward the back, serves to enhance your awareness of the dimension, how the light and shadow is showing you the impressed elements. The pattern of straight lines provides a structured frame that the flowing curves reside in and move through. You also get hints that the natural, curvy figures impressed into the tiles are a repeating pattern of their own, when you look at it closer. All that in one picture of a floor!

    Here the repeating pattern of the balconies serves to enhance the feeling of height in the skyscraper in Barcelona. You see this in many “looking up” skyscraper shots, but this one is very dramatic because of the horizontal lines and angles jutting out on each floor.

    This image, from Milan, shows how the pattern of the light and shadow on the unusual bricks of this building serve to show the curve and size of the building. You see the bricks, but the repeating pattern of them immediately leads your eye along the curve toward the edge. What happens after the edge of this picture? The crop of the image, which doesn’t show you beyond the building, leaves you with the impression that the pattern continues indefinitely.While all of the examples so far have been of architecture, I also find store displays a wonderful source of repeating patterns. In this image,you have repeating patterns in three dimensions. An image of a single chocolate bar, while showing the design of the wrapper, color, etc., would not be as interesting as this one with the repeating pattern. The pattern of multiple bars repeated, as well as the repetition in the third dimension, gives depth and a feeling of abundance. You see the chocolate bar wrapper just as clearly as if that were the only thing in the photo, but you also see more.

    So, how can you use repeating patterns in your photography? Some ideas and tips…
    1. Look for repeating patterns, they are everywhere around us. Architecture is one of the best sources, because it takes lots of little, repeating pieces to build something big. Elements of architecture with repeating patterns can be found in the facades – windows, doors, trim, bricks, blocks of stone – or inside – steps, beams, flooring. Our modern world is built with repeating patterns! Stores are also a good source of repeating patterns, because they have a lot of the same thing to sell. Look for creative store displays that use that to good effect.
    2. Look for opportunities for the pattern to be the subject. Choose your composition and angle such that you see the pattern repeat several times at the same size and there is no “perspective” effect. This will often be looking straight at, or very close to straight at, the subject pattern. Try converting to black and white to enhance the pattern aspect, removing color as a difference that may distract from the pattern itself.
    3. Look for opportunites for a pattern to enhance or contrast with a subject. Use angles that show the dimension – distance, height, depth. Use compositions that capture differences in the pattern – whether it be color or shape. Use a pattern as a backdrop for the subject. Use post-processing, like selective color, to have one element of a repeating pattern pop out.

    What other ideas do you have for capturing images with repeating patterns? I’d love to see what your eye sees! Share here in the comments or join in the Flickr group.

    (Want to explore some more? You can find all past explorations linked in one place here.)

    Filed Under: Exploring with a Camera, The Kat Eye View of the World Tagged With: architecture, Barcelona, Gaudi, Italy, pattern, Switzerland

    « Previous Page
    Next Page »
    • Email
    • Facebook
    • Instagram
    • RSS
    • Twitter

    Upcoming Events

    Books Available

      Digital Photography for Beginners eBook Kat Sloma

    Annual Postcard Swap

    Online Photography Resources

    search

    Archives

    Filter

    • Email
    • Facebook
    • Instagram
    • RSS
    • Twitter

    Upcoming Events

    © Copyright 2017 Kat Eye Studio LLC