Kat Eye Studio

  • Home
  • Portfolio
  • Books
    • Art with an iPhone
    • Digital Photography for Beginners
  • Workshops
    • Mobile Photography Workshop Series
    • iPhone Art Workshop
    • Out of the Box Composition Workshop
    • Photography & Creativity Talks
  • Free Resources
    • Mobile Tutorials
    • Exploring with a Camera
    • Liberate Your Art Postcard Swap
  • Blog
  • About
    • Artist Statement
    • Background & Experience
    • Contact

October 7, 2010 by Kat

Exploring with a Camera: Photo Essays

In the last year I’ve explored a vast range of art and photography. Visiting galleries, taking online classes, searching out photography blogs, looking at Flickr. What I’ve found, in all of that, is that my enjoyment of art, and especially photography, significantly increases with understanding of the back story… either the story of the artist or the story of the subject. It gives such a wonderful insight into the artwork that has been created, it’s like an additional dimension to the art itself.

I think that’s why I blog the way I do, and I’m attracted to other blogs with wonderful imagery and words. I want the story behind the image, along with the image. I connect with it in a deeper way, and I want you to find that here as well.

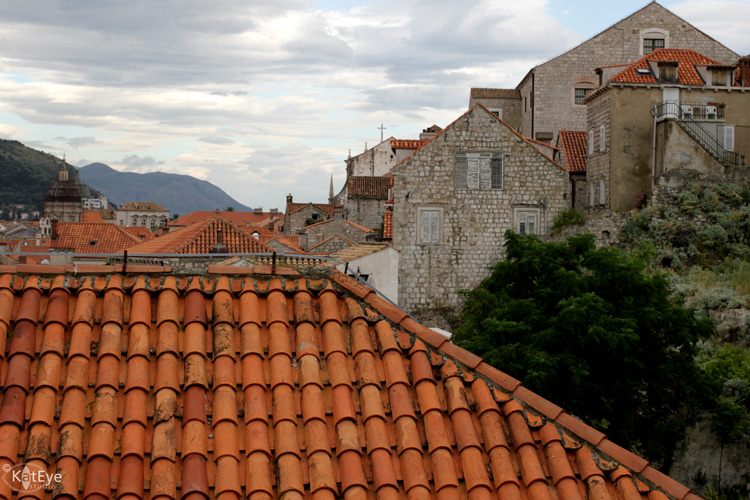
So today for Exploring with a Camera I want to talk about Photo Essays – which are beyond even what I normally do on my blog.  Yesterday’s post Camaraderie of Beer on Oktoberfest is an example of a photo essay, or my earlier post The Story of the Rooftops on Dubrovnik. There are times that a story needs to be told, and it takes more than one photo and a few sentences to tell.

You might ask, isn’t just a regular blog post, with several photos and text, a photo essay? Maybe, maybe not. I’ve read a lot of blog posts, but only a small few that I would categorize as a photo essay.  Two that stand out in my mind are Kirstin’s post Where I Live on the Mortal Muses More Musing site, and Patty’s post The Down Side on her blog, Nomadic Notebook.
A photo essay takes a few photos, combined with words, to tell a specific story of a time, a place, an experience, a piece of history. It has impact. It is basically photojournalism, but with a personal twist, by my definition. While you want to convey the information, you also want to convey the feeling you might have had. Why the story or experience is important to you, why you felt it needed to be told. In a photo essay, you focus on a specific point with your photos and words. Every photo tells a piece of the story, every word needs to be there. It’s not just the best photos of the day, but the ones that are needed to support the story.

So, how do you go about creating a photo essay? Here are a few tips:
1. Decide the story you want to tell. Be specific for the best impact. For example, I didn’t want to try to tell whole the story of Oktoberfest – that’s too big for just a few photos, I would lose the impact. So I took one aspect I noticed, the camaraderie in the beer drinking, and focused on that.
2. Choose your supporting photos. In some cases, you might have the idea in your head as you take the photos, which is what I did for my Oktoberfest essay. In other cases the story might develop as you review past photos, which is what happened for my Dubrovnik essay. Go through your photos, pick all of the ones that seem to apply. And then narrow down. Narrow down again. Make sure that each photo is essential to the story you are telling – try to get it down to 3 to 5 photos if you can. As I mentioned above, pick the best photos for the story, not just the best photos of the day. If they don’t help tell the story, save them for something else.
3. Write the essay, inserting the photos. You might find that you have to switch them around from your original idea slightly or you need to choose a different photo for the story to flow. That’s ok!  It doesn’t have to be long, just get the main story written with the photos inserted.
4. Edit. Step back and read it, making edits. Read it again. Take out anything that doesn’t flow or support your point. It might be a great idea or photo or brilliantly written sentence, but it has to fit the story. Do with your words what you did with your photos – narrow down.
5. Publish! Share that photo essay with the world. The world needed to see it, or you wouldn’t have had the idea in your head. If you ever see or feel a story that needs to be told, follow that urge to conclusion and then see what comes back. You just never know!

Not so many photos today, but I hope that this post has inspired you to look at how you can combine your images with words to great effect, or to notice how others create an impact using the photo essay. Come back next Thursday to share your view and link in to any photo essays of your own, past or present. Or link in to ones that you have found on the web, that have impacted you in some way. You can post your photo essay images to the Flickr pool too – I’ll be watching for them there!

Note: This post is part of the Exploring with a Camera series, published every two weeks. See all past exploration topics here.

Filed Under: Exploring with a Camera, The Kat Eye View of the World Tagged With: Croatia, Dubrovnik, photo story, photography

September 23, 2010 by Kat

Exploring with a Camera: Night Photography

Welcome to the last day of Six Days of Night! If you don’t have the bug to try night photography after this week, then I’m not sure I’ll be able to convince you. But if you do have the desire to try it out for yourself, today I have some information that will help get you started.

I discovered night photography about a year ago, in October 2009, on a trip to Florence and Tuscany. I’d taken the odd night photo here and there before this, and some even came out great, but it wasn’t until we began travelling in the winter months last year that I really fell in love with it. When you travel in the summer, you have these long days to run around and see everything. By the time the evening comes along, everyone is worn out and you head back to the hotel room as the light fades, especially if you have kids. In the winter, however, the days end early and you find yourself out and about in the darkness, seeing the world in a totally different light. Amazing, beautiful, atmospheric light that is like no other. And just like the quality of light in the daytime, which changes from place to place, the quality of light and atmosphere of places at night changes too. You’ve probably noticed that in the photos I’ve shared over the last few days.  The photo above is one of my first attempts at night photography, in Florence.

My definition of “night photography” covers a broad range of light. As soon as the sun goes down and the lights start coming on, to me that begins the night. This is the time that the flash would start automatically coming on in your camera or you might just put it away, if you are used to using natural light.

Let’s look at how light progresses from day to evening. This image of London is from very early evening. You can see that the sky is still quite light, but the phone booth is lit, the streetlights are on and the windows are starting to glow with light. There is still a lot of light at this time for your photos, but you start to get the warm glow that makes night photos something special.

The transition from day to night is called twilight or also the “blue hour” because you see the sky transition through a wonderful range of blue. The contrast of this blue sky with the warm yellow of artificial lights is especially pleasing, as in this photo from early evening in Split, Croatia.

Toward the end of the  “blue hour,” the skies are an amazing deep blue, as in the photo below taken the same evening in Split, just later. The blue also changes as you look toward the west, where the sun just went down, versus toward the east. You can see the variation in blue in the sky of this image below, from bottom right to top left. I can’t image a prettier blue color! No color adjustments done to this at all.

After a while, you will find yourself in full night, where the background skies are black. This has a completely different feel in the photo, all illumination is from the artifical lights around, as in this photo of Piazza San Marco in Venice.

Guess what? The blue hour happens twice a day, before dawn and after sunset. There is a great website, bluehoursite.com, that gives you the times of the blue hour for anywhere in the world on any day, so you can plan ahead!

Now that we’ve talked about light, let’s talk about how to use it creatively at night. There are so many ways to photograph the night! Looking through my photos last week I came up with lots of ideas. To start off, you know that reflections are one of my favorite things, whether the smooth as glass reflection of my favorite Venice photo (I had to slip this one in!), or the ripples of the bay in Split.

Reflections don’t only come from a large body of water at night as I’ve shown above. The pavement of the sidewalk, streets, rain… at night there are unending sources of light reflections. Not only are they cool to capture, but they increase the light available for taking photographs. Keep your eye out for them! We had a rainy night during our visit to Bath, and the reflections were so interesting. The really highlight the stone walkways and streets.

You might also note how yellow the light looks in the above photo, I did not do any adjustments to white balance to change how it came out in the camera. In my night shots I like the yellow glow of the lights, because that is part of the feel of night for me, although sometimes I do tone it down just a bit. You have to be careful when you adjust white balance on a night shot, because you can make the image look weird. The image below is an example. Left is out of the camera (quite yellow), Center is the color correction I like (still slightly yellow), and Right is over-corrected (no yellow left at all). While the flowers are white in the right one, that adjustment ends up creating an overall blue cast to the photo, and it no longer looks quite like night.

Night is a time for wonderful light bokeh. Since you often need to shoot with a wide open aperture to keep shutter speed down, you can capture the bokeh of lights in the background. This photo of the Chapel Bridge and the Lucerne water front is a good example. Since I’ve focused close to me, on the bridge, the waterfront behind is out of focus with nice bokeh. I’ve decided that I don’t use this effect enough, I need to play with it more in my night shots.

Watch for light pools or effects. Some of the paned windows in York provided wonderful shapes of light on the ground. I would love to go back and focus some shots just on those!

Night is also a wonderful time for silhouettes. Either from the fading light of twilight, or an artificial light source. The silhouette of the person walking by the bookstore in Padua, in the shot below, gives interest to the colorful background. And the strong light coming out the store front made this easy to get.

Strong light can also create shadows, sometimes in multiple directions at once if there are multiple light sources, like in this photo of my son’s legs and feet. Pretty cool! You don’t see this in the day, since we only have one sun. 🙂

Another great thing to capture at night is motion – in the form of blur. Because of the longer exposures you need, moving things will be blurred in your frame if the camera is still. You can also try to capture a moving object as still, with the background blurred to show motion, if you pan along with the moving object. This takes a lot of practice and trial and error. I don’t have any great examples of this, although I’ve tried, but the photo below from Venice shows the idea. I was on a moving boat, trying to get the bridge over the canal still while the rest of the photo was blurred. More practice is obviously needed, but hopefully you get the idea.

Sometimes, when you have just gone beyond the limits of any clear, in focus shot, just play. The photo below is from that same Vaporetto ride in Venice. Since I was moving on the boat, I played around with longer shutter speeds and intentionally moved the camera to get some cool effects. Kind of neat how the background buildings are still clear and “still” while the bright lights are moving – completely unplanned.

And finally, don’t be afraid of the dark. This is night, you can have large areas of your photo completely black and still have an amazing photo. Throw away the idea of the the entire frame being exposed when you are shooting at night, and just go for your focal point. It can create a dramatic image, like this one, another all-time favorite of mine from Venice.

My main mode of operation is to handhold my camera for night shots. I just am not willing to haul a tripod around with me all day so that I can have it handy at night, so big and cumbersome. So I’ve learned quite a bit along with way that I can share with you for optimizing your ability to get good “Handheld” night shots. (By the way, these will work in any low light situation, such as indoors, not just as night.) Tips for “Handheld” night shots:

  1. First off, turn off your flash! Turn your camera to a mode that won’t allow the flash to come on.
  2. Camera shake is your biggest enemy here – just the movement of you holding the camera while the shutter is open. A rule of thumb to avoid camera shake is that the shutter speed should be no slower than 1/[Your zoom setting]. So if you are at 50mm zoom, your shutter speed shouldn’t go below 1/50. At 35mm, shutter speed of 1/30.
  3. Increase your stability by taking a wide stance with your feet, tucking your elbows tight into your sides, and hold your breath while you take the shot. I can sometimes get good shots down to 1/20 or 1/15 with this method. You can also lean against a pole or the side of a building for increased stability.
  4. You can also increase your stability with an “assisted handhold” – use anything stable around, like a railing or bench or fence, and use that to help hold your camera. I put my hand under the lens, spreading my fingers and moving them around, to support the camera with the right angle. I also have to plan for more straightening and cropping in these shots, because you don’t have as much control. Most of my Venice canal shots were done with the assitance of a bridge railing for stability. Another option that is less cumbersome than a tripod but provides more stability is a monopod.
  5. Set your camera on Aperture Priority, with the setting as wide open as it will go. This will help keep your shutter speeds as fast as possible.
  6. Or, set your camera on Shutter Priority, to a reasonable shutter speed. I often do this to set it at 1/50 when we are just walking around a town. I’ve found that this setting works consistently well for avoiding camera shake on the go, and it forces the camera to choose the best aperture for the exposure. This works when my camera is choosing slower shutter speeds but not using the full aperture range of my lens.
  7. My last resort is to bump up my ISO setting. This is one of the most wonderful things about digital, that we can adjust our ISO setting, instead of being stuck with whatever is set for the film that is loaded. When you’re wide open on aperture and your shutter speed is still too low, then increase the ISO setting. I kind of think of ISO increase as a last resort, because with every increase to ISO you also increase the noise. I purchased my current camera (Canon Rebel T1i) partially because of the increased ISO range, 3200 and beyond, but the more I’ve gotten into night photography the more I realize that I would rather not use the ISO settings higher than 800 if I can avoid it. But – when faced with either not getting the shot or having a noisier shot – I’ll always choose to get the shot, even with the noise.
  8. If all else fails, underexpose. By underexposing, you can drive your camera to shorter shutter speeds. As long as you don’t underexpose so much that you lose the vital pixel information of your focal point, you can compensate exposure in the computer using software.  I’ve learned that I can easily underexpose 2/3 to 1 full stop on night photos and recover them in post processing.
  9. Constantly check your settings, especially shutter speed, if your camera is in an auto mode for exposure. You have to be aware of them as you shoot at night, even more so than you might normally, because the lighting conditions change so much from place to place.
  10. Always take multiple shots, because with several you might get one that one perfect one. There is a lot more room for error with night photography. And happy accidents too! Review in camera using the zoom feature, because sometimes a shot might look perfect on your tiny screen only to have some camera shake when you view it larger on your computer.
  11. Finally, if you just reach the limits of your equipment and don’t want to go the tripod route, there is nothing that can help your handheld night photography more than upgrading your equipment for a lens with a wide aperture. Night photography is one area where your equipment really does come into play a bit more, so you will have to experiment and find the limits of your camera/lens combo.When night comes, I switch to my 35mm f/1.4 lens. This has given me an extended range of light I can work with at night. Consider trying out a 50mm f/1.8 lens as an inexpensive first step into this arena, if you have a dSLR. And if you have a point-and-shoot, well… you might want to think about a dSLR or use a tripod.

As I’ve progressed further with night photography, and especially after my photo lesson in Paris, I can really see the benefit of the tripod. You can decrease your ISO and increase your shutter speeds significantly and take your camera limitations mostly out of the equation. The cost of it is carrying the tripod, so for me, I see this as an option when I am intentionally travelling to photograph rather than when I photograph as I travel (the latter is my normal mode of operation). Tips for “Tripod” shots:

  1. You need a good stable tripod that will not move with normal winds and can hold your camera. My 24-70mm lens is a big one and so most of those little, compact tripods you can buy won’t work for my camera. Also recommended with a tripod are a quick release feature (where you don’t actually screw the camera into the tripod, but into a piece that you can easily connect and disconnect from the tripod) and a level that can help you keep your camera straight (something I need!). There are multiple types of adjustments available, but you want to make sure that you can do both horizontal and vertical orientation easily. There are so many types of tripods out there, if you can visit a store and try them out with your camera before you buy, that is recommended. I have a simple tripod that is strong enough to hold my camera stably, has quick release, but is as light as I could manage.
  2. Ensure flash is off.
  3. Set your ISO lower, to reduce noise. Try as low as the camera will allow you to set it, and work up from there as needed.
  4. You have more flexibility in your aperture and shutter speed settings, so play around here. You might still want to set your aperture wide open, to reduce the shutter speed, just to avoid really long exposures you will need for a low ISO setting. You are still subject to camera shake with a tripod, just less so. The longer the shutter is open, the more likely you are to have an issue.
  5. Use a remote shutter release. You can still shake the camera on a tripod just by pressing the shutter. Remote shutter releases (cable or wireless) are available inexpensively for many cameras. This removes you completely as the source of the camera shake.
  6. Use your camera self timer. Another option, if you don’t have a remote shutter release, is to use the self timer feature that most cameras have these days. This doesn’t work so well, however, if you are trying to time the shot with movement in or out of the frame. For example, in many of my Paris shots, I had to be ready to shoot as soon as my frame was clear of people. If I used the self timer, I could never have been able to hit the shutter such that 10 seconds later the frame was clear.
  7. Again, review, check your settings and take multiple shots. Once you get everything set up perfectly, you don’t want to be disappointed if you discover on the computer that it was slightly out of focus. It’s hard to use manual focus at night, so I use auto focus as much as possible but that isn’t always fool proof either.

If you stuck with me here to the bitter end you must be ready to start exploring night photography. And guess what – here in the northern hemisphere the days are getting shorter and the nights longer, so you’ll have plenty of opportunities in the coming months. The Flickr group is available to post your shots, but I think I’m also going to mix it up a little bit to see if I can increase the sharing. Next week come back on Thursday and you can add a link to your night shots (blog or website or Flickr, anywhere with a web address to your specific shots) to share with the rest of the readers here too. Won’t it be fun to go blog hopping and see what everyone else has captured in the night? I can’t wait to see your view!

Filed Under: Exploring with a Camera, The Kat Eye View of the World Tagged With: Bath, blue hour, Croatia, England, evening, Florence, Italy, London, Lucerne, night, photography, reflection, six days of night, Split, Switzerland, Venice, York

September 21, 2010 by Kat

Six Days of Night: Croatia

Night is a time of contrasts. Light and dark. Busy and quiet. Wandering the old town of Split, I found this lonely little table in a back alley. By day, you would probably find someone drinking a coffee here. By night, it was silent and empty. The security lights are stark and unforgiving.

Contrast that with this main street in Dubrovnik, where the night is a gathering time. Warm light spills out of the doors and the restaurants, to reflect on the marble-paved streets. Artistic lights highlight the architectural details of buildings. You can almost hear the murmur of conversation, the clank of utensils on plates, drifting laughter.

Both Croatia, both historic city centers, both night. Yet so different.

Filed Under: The Kat Eye View of the World Tagged With: city, Croatia, Dubrovnik, night, six days of night, Split, street

August 10, 2010 by Kat

Creative Contemplation

Don’t you love it when things in life come together? Everything right now for me is centering on the topic of creativity. Being aware of, responding to, listening to creative urges. Following my heart.

Recently, I’ve been inspired to write posts (yesterday and Friday) about creativity, exploring the process of being creative. These posts have come to me, come through me, as I sat down to write. No planning involved, just following where my heart led.

Yesterday, I posted a comment and link in response to a Shutter Sisters blog post, about a photograph that revealed more of me through the lens than I expected. That post from about a month ago, Create to Live, reveals my fundamental desire to create. Revisiting it reminded me of what is calling to my heart.

This morning, in looking for some links to older blog posts for another project, I started going back in time. Back to over a year ago, before I was doing the photo-a-day on my blog. I found a couple of my earliest posts on following my creative urges, and the things I was learning about creativity at the time. I can see that I was just starting on the creative path, just beginning to listen to my heart.

Today, as part of a morning ritual of inspirational reading, I started the August section in Simple Abundance: A Daybook of Comfort and Joy by Sarah Ban Breathnach. It’s all about creativity, as a “sacred conduit to your authentic self.” Sarah says this about expressing creativity, “When we choose to honor this priceless gift, we participate in the re-creation of the world. When we follow our authentic path with love, embracing our creative impulses, we live truth even if what we think we’re doing is just planting a flower bed, cooking a meal, nuturing a child, editing a book, producting a television show, sewing a curtain, writing a brief, painting a pictures, teaching a craft, composing a song, or closing a deal.” That resonated with me… following our heart, through creativity, is a positive gift to the world.

So, what is it I’m getting out of all of this? A reminder that this creative journey is ongoing, I’ve been on it for a while. An acknowledgement of the progress I’ve made since the start. A realization that I am following my heart, following the creative impulses, and they are leading me amazing places. Not only that, the more I practice, the easier it gets. I get an incredible sense of wonder and awe at the whole process!

And one last thought, one last question to answer… How does this photograph tie in to the whole thing? This is an image I captured when following a creative urge. No purpose other than that. I loved the light, the afterglow of the sunset, reflected on the lifeboat of the ferry we took from Italy to Croatia. I love the composition. It gives me a sense of calm, contemplation, and of beauty in the unexpected. I followed my heart, and was rewarded. I’m starting to learn, it’s what happens every time!

Filed Under: The Kat Eye View of the World Tagged With: Adriatic, boat, creative, Croatia, evening, ferry, Italy, personal growth, sunset

August 9, 2010 by Kat

Blank Slate

Every morning, I come to this point, with a blank slate. An empty page, devoid of image or words. Ready to write, ready to receive some inspiration for the day. Sometimes, I have an idea of what I want to write, what photo I will select, before I sit down. Sometimes I don’t. And sometimes, even when I have an idea, I throw that idea out the window and just write whatever comes into my head at that moment. Post whatever picture calls to me. It’s become an interesting process, and I learn unexpected things from my photographs and my writing this way. A blank page becomes the window to my soul.

It’s one of the reasons I don’t write scheduled posts much while I’m on vacation. This is part of my daily practice of creativity, and I can’t seem to pre-schedule my future creativity. Sure, I could share pictures while I’m gone, but the magic of the daily choice, the daily contemplation that goes along with them is missing.

Do you have a daily creativity practice, that has become essential to your art? What is it, how did you find it? I’m curious how you practice your creativity, how you open that window to your soul.

Filed Under: The Kat Eye View of the World Tagged With: creative, Croatia, Dubrovnik, personal growth, soul, window

July 21, 2010 by Kat

Why Windows?

An attractive set of windows in Dubrovnik caught my eye. As I was editing this photo and others from this day I wondered, why windows? Why do they catch my eye so? Especially ones with plants and flowers in them. Ones like this, with interesting bars to cover them too.

Maybe it’s because of the individuality of each of them. Each window is different, unique, has a history of its own. The decorations reflect the individuality of the owners, no two are alike. They are an outward display of the lives inside. So much of peoples lives is closed inside here in Europe – inside the shuttered windows and big solid doors – that this is a little glimpse that there is someone living in there. And someone there who cares to make their place look pretty on the outside, even if the only way to do that is to decorate the window. Not for the tourists, but for themselves and their neighbors, the people who will enjoy it every day.

And I get to enjoy these windows, to photograph them, and to share them with you. Thanks to all of these anonymous people, who make my images possible. They are the true artists here!

Filed Under: The Kat Eye View of the World Tagged With: Croatia, Dubrovnik, flowers, plants, window, wrought iron

« Previous Page
Next Page »
  • Email
  • Facebook
  • Instagram
  • RSS
  • Twitter

Upcoming Events

Books Available

  Digital Photography for Beginners eBook Kat Sloma

Annual Postcard Swap

Online Photography Resources

search

Archives

Filter

© Copyright 2017 Kat Eye Studio LLC