Kat Eye Studio

  • Home
  • Portfolio
  • Books
    • Art with an iPhone
    • Digital Photography for Beginners
  • Workshops
    • Mobile Photography Workshop Series
    • iPhone Art Workshop
    • Out of the Box Composition Workshop
    • Photography & Creativity Talks
  • Free Resources
    • Mobile Tutorials
    • Exploring with a Camera
    • Liberate Your Art Postcard Swap
  • Blog
  • About
    • Artist Statement
    • Background & Experience
    • Contact

October 21, 2010 by Kat

Exploring with a Camera: Rain


With the change in seasons, in the places I’ve lived the last 12 years or so, we wave good-bye to the consistently sunny days and welcome the wet. Rain will be a consistent part of life for the next few months as winter comes on, with the occasional break in the monotony for snow or sun when we’re lucky. A rainy day is a great time to curl up under a blanket, with a book and a cup of tea. It is also a great time to get out and photograph!


A while ago I wrote a blog post that said when life gives you rain, you should take photos anyway. Today let’s explore the ways to capture the beauty to be found in the rain…


The light is completely different in the rain. First off, it’s usually cloudy during the day, which provides softer, indirect light. Second, the wet surfaces reflect the light in completely different ways than dry surfaces. The photo at the top of the post is a good example of this – the leaf and the stones are highlighted by the reflections of the light. What would be an interesting composition for it’s contrast when dry, gains even more interest for the way the individual elements stand out from the light on the water.


This photo from Orvieto, Italy is a daytime example of how the wet ground reflects the light, drawing your focus along the ground from the bright doorway in the top left down toward the scooter in the bottom right.
The wet ground in this photo of Bath, England at night serves to contrast and highlight the row of benches along the sidewalk. As I mentioned in my Exploring with a Camera post on Night Photography, wet surfaces at night can add much needed light for taking photos at night.

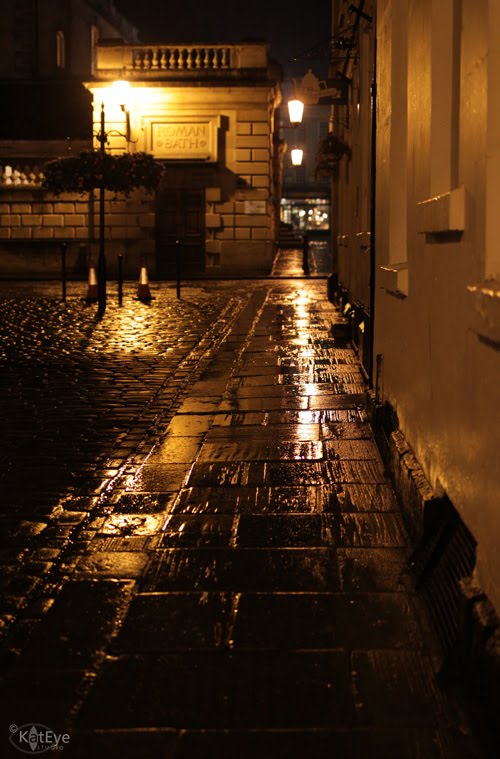
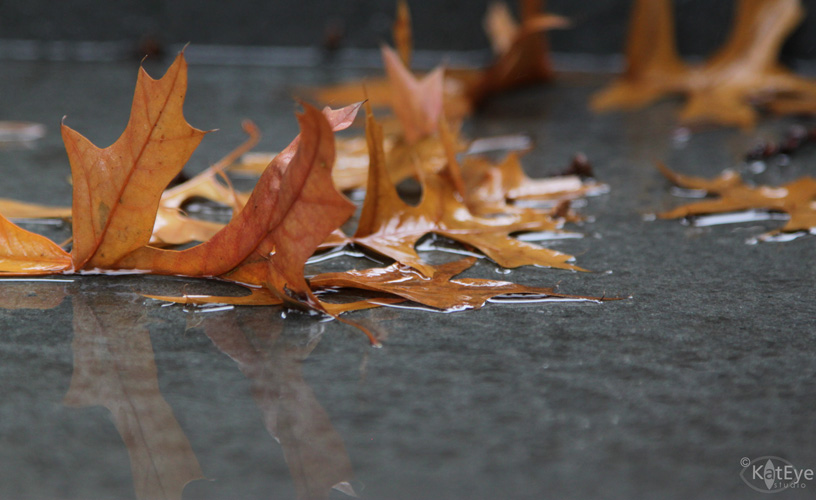
Not only is the light reflected, but you can great image reflections as well with a smooth surface or a puddle. The thin layer of water on this smooth concrete makes a wonderful mirror for the leaves on the ground.

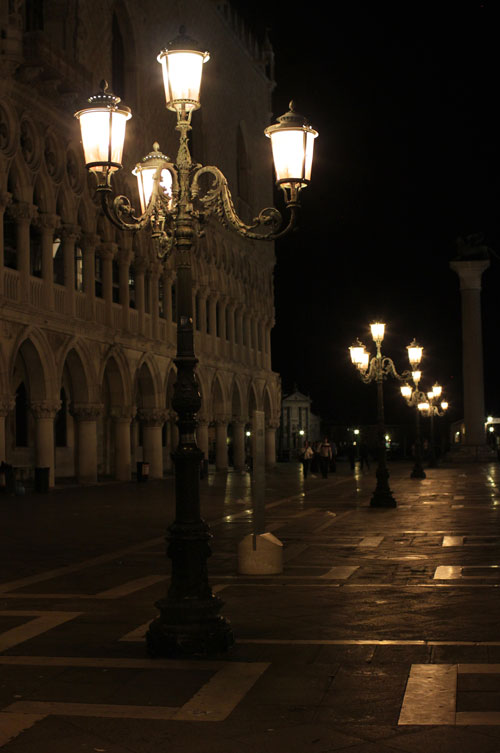
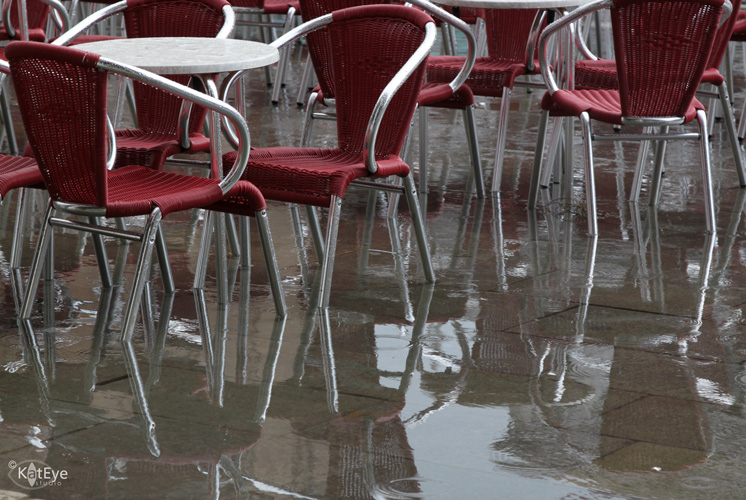
This puddle in Piazza San Marco in Venice serves to reflect the geometry of the famous tables and chairs, making a more interesting composition than the tables and chairs alone.

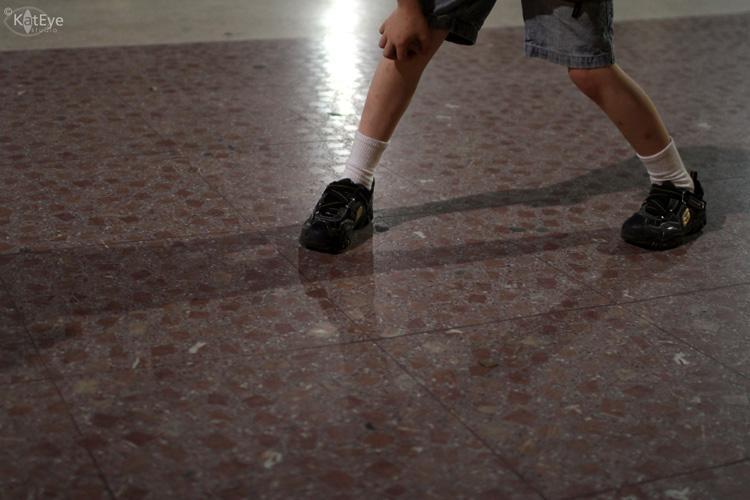
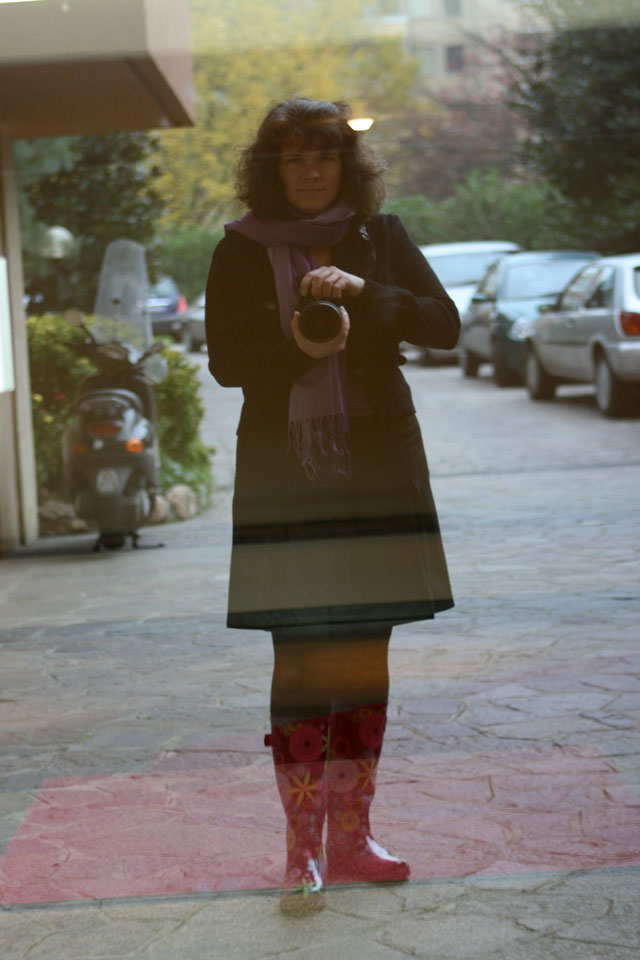
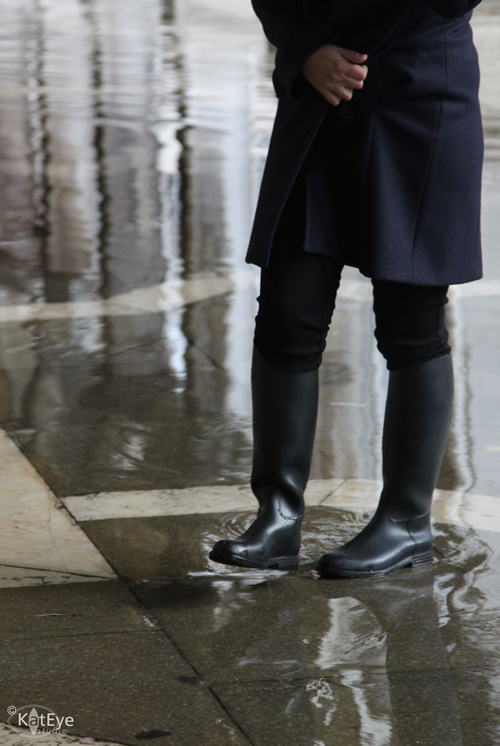
And while we’re talking about puddles, how about capturing some splashing through them? Of course, this image is a bit more sedate than most puddle-splashing pictures, a capture of Italian rain fashion more than splashing but you get the idea. The movement of water in the puddle along with the reflections makes the photo more than just photo of rainboots.

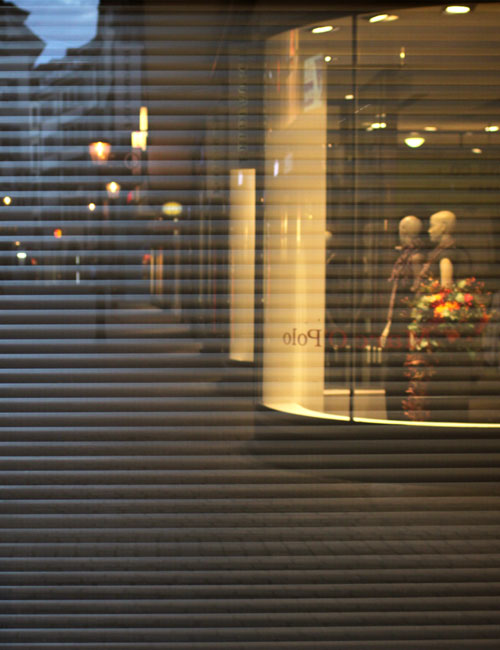
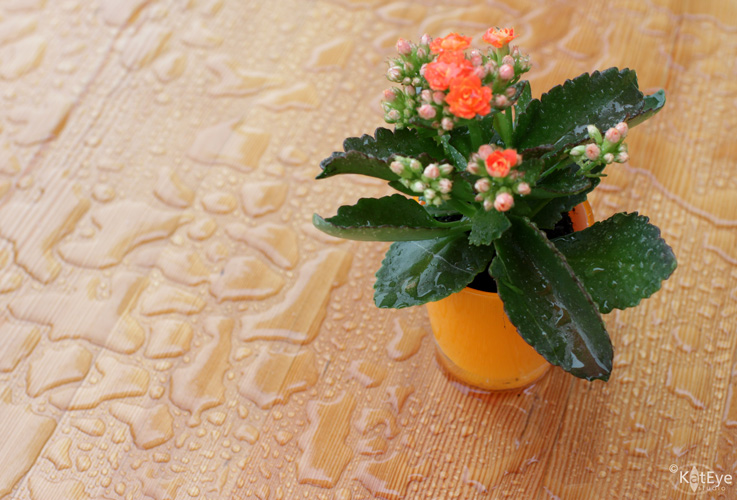
Out in the rain, look for ways the water moves across and off surfaces. This restaurant table was so highly polished that the rain water beaded up into interesting shapes, a nice backdrop for the flowers.

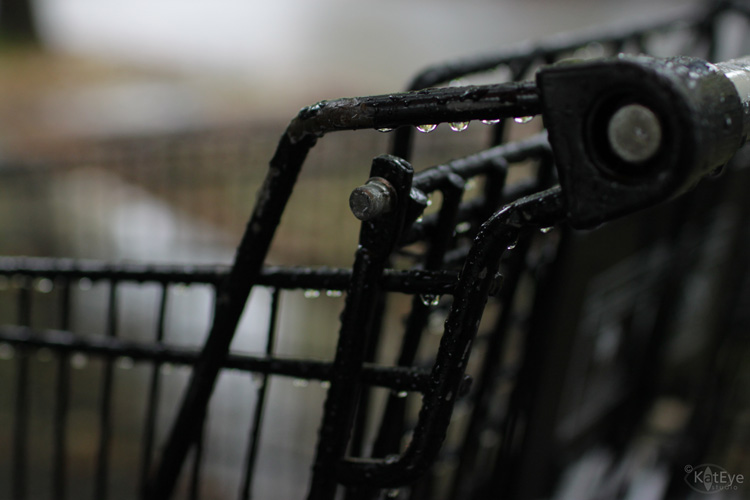
Look for the drips ready to fall…

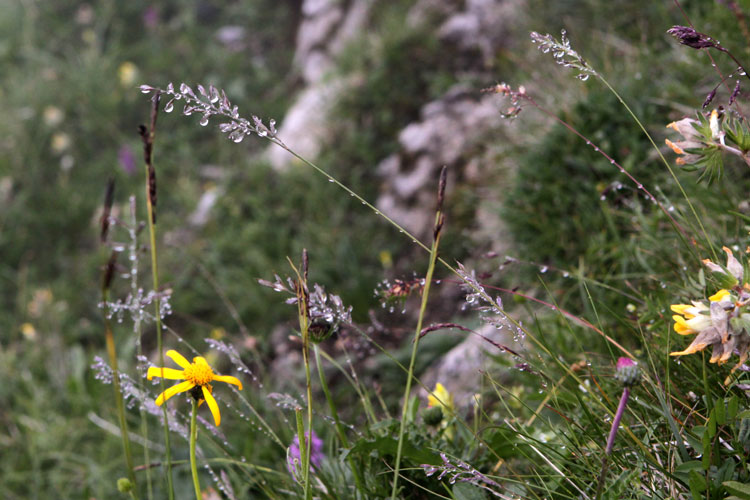
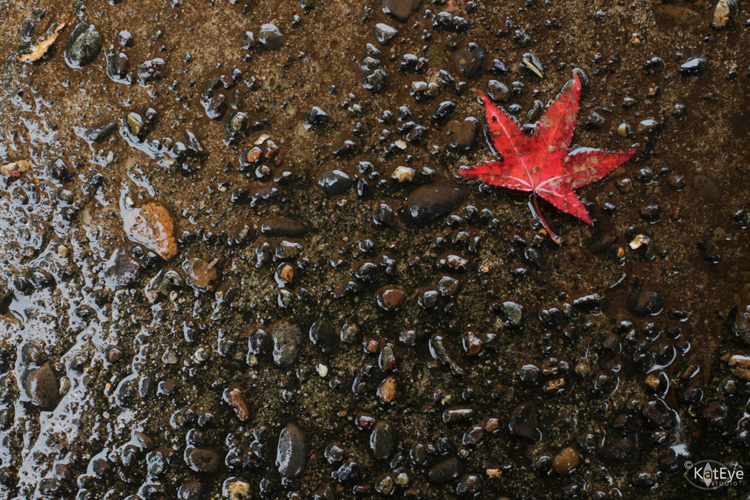
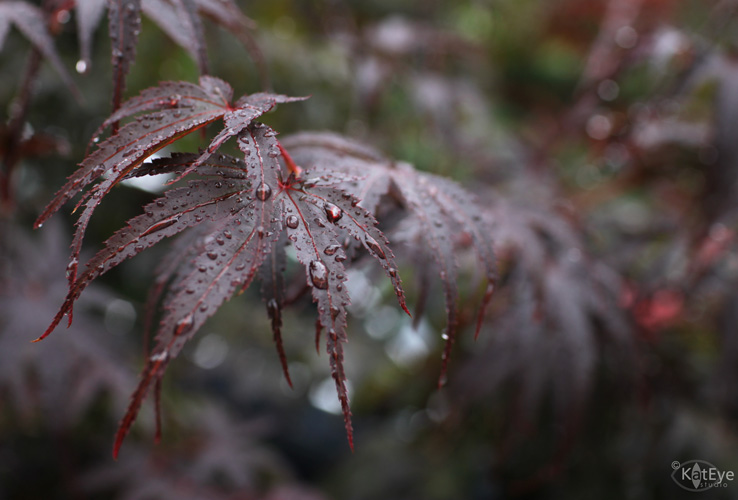
Look for the drops that grace the leaves.

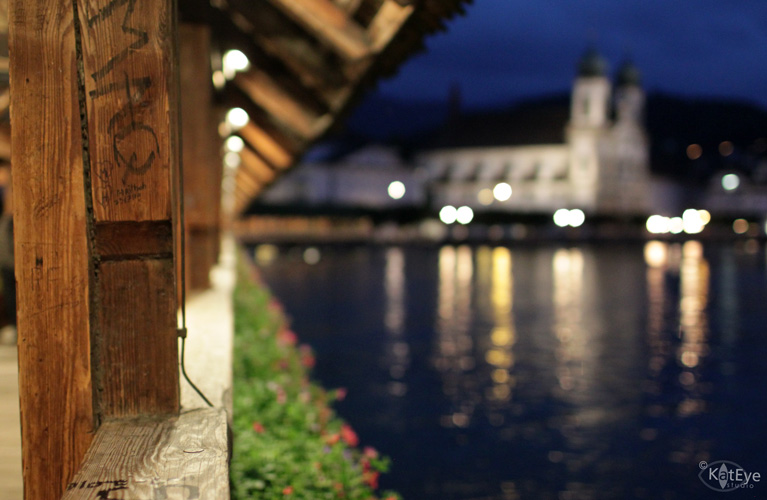
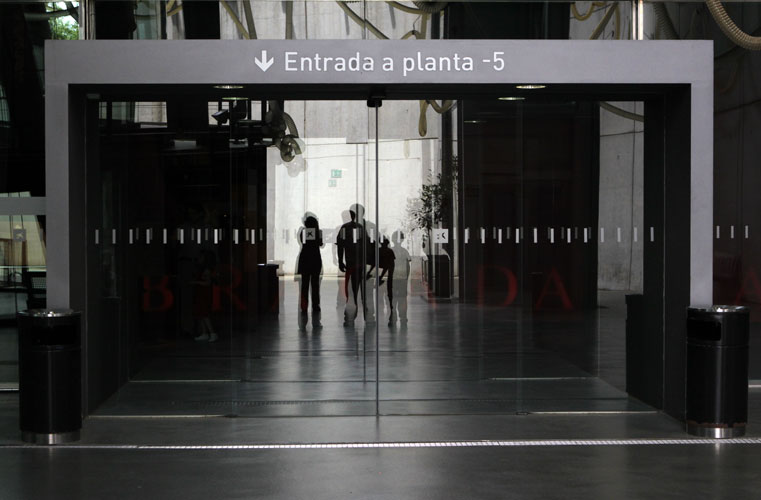
It’s also fun to capture people in the rain. They are more “anonymous” with their hoods and umbrellas, hunched up and hurrying along. I like to capture groups of colorful umbrellas, as on this bridge in Lucerne, Switzerland.

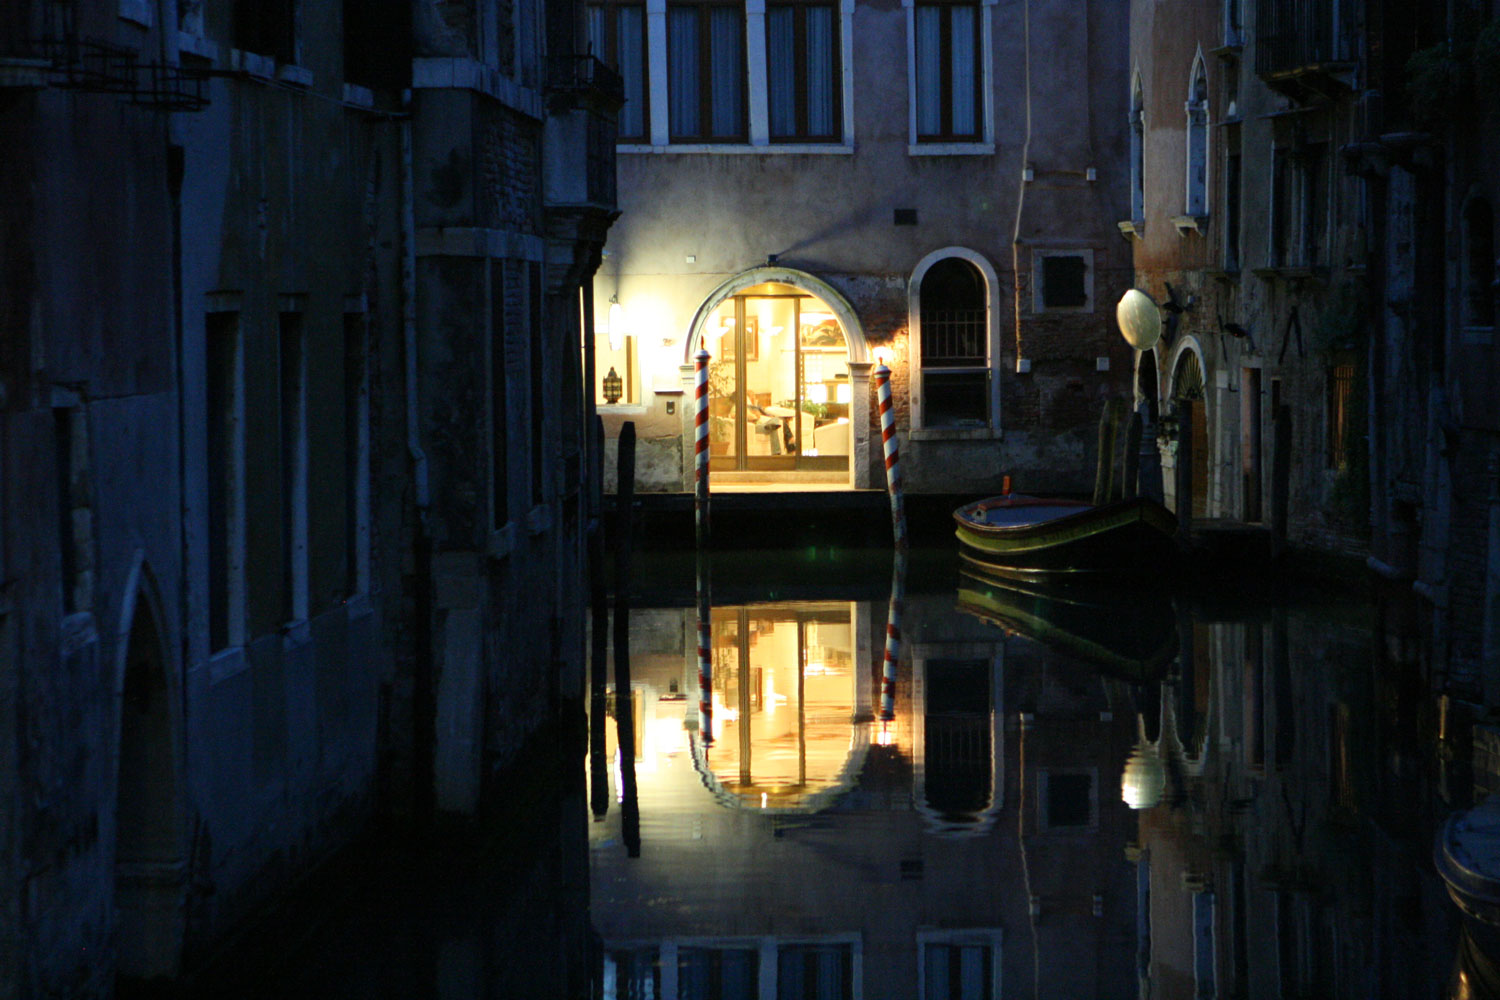
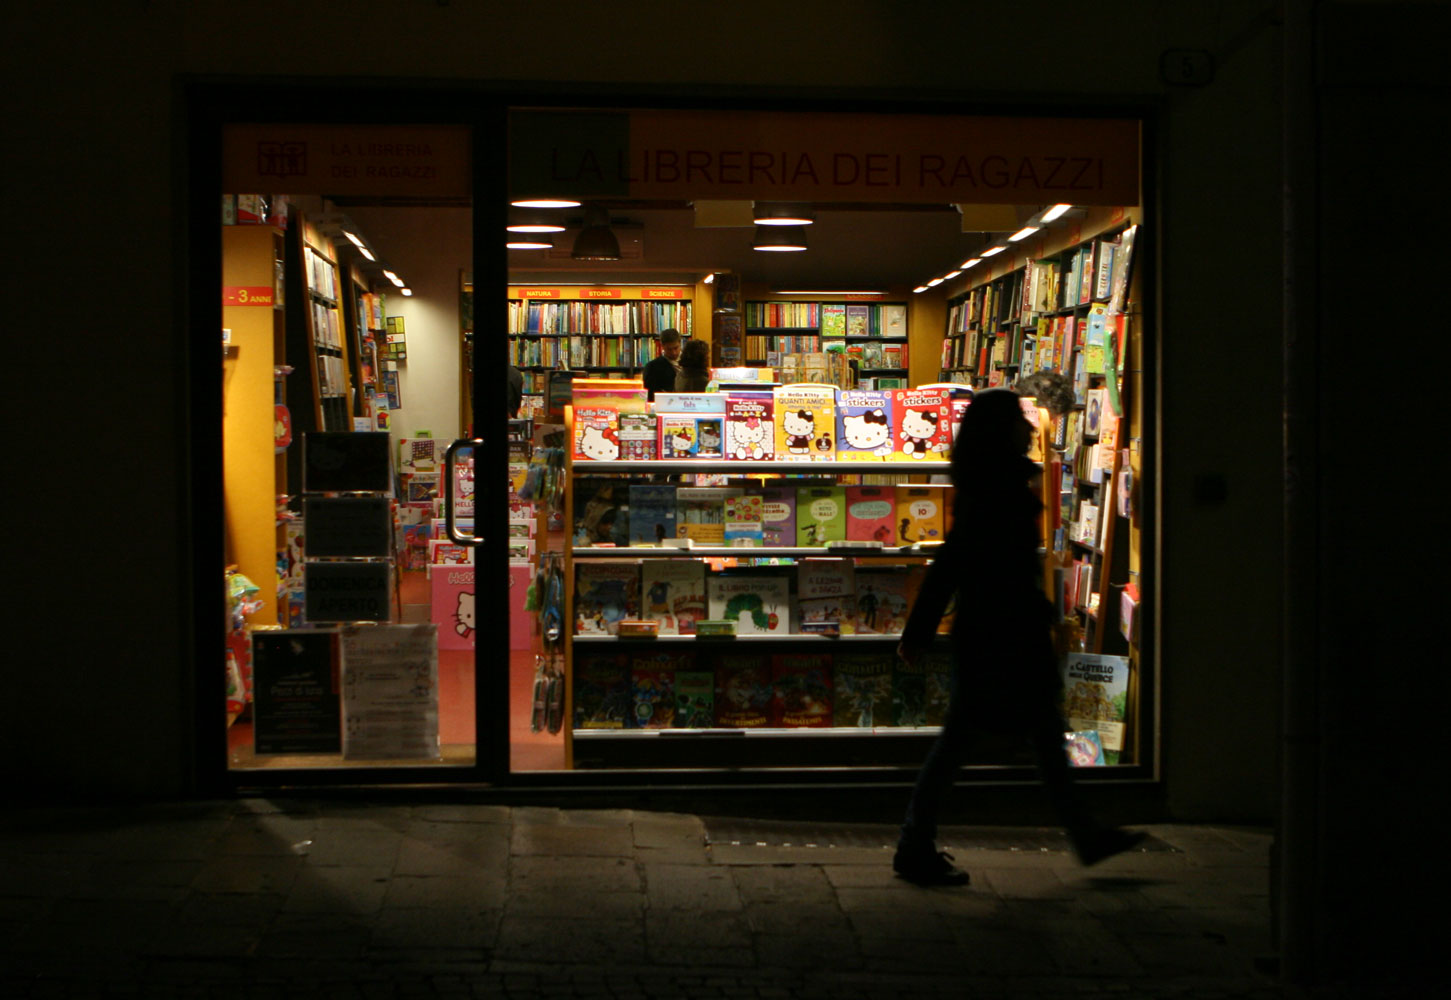
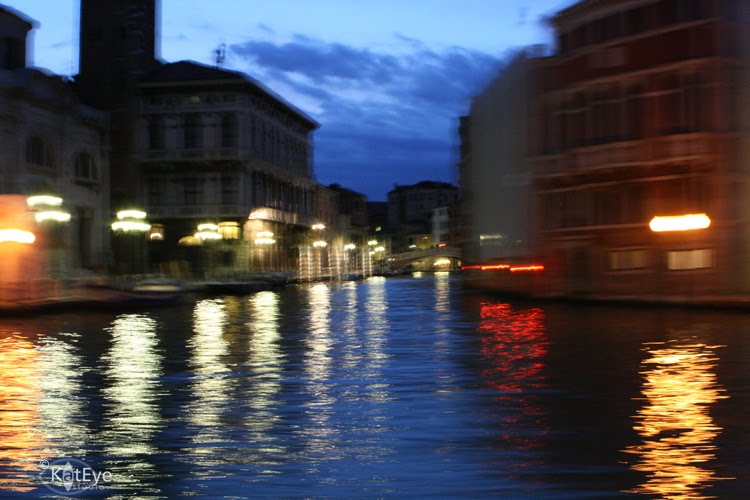
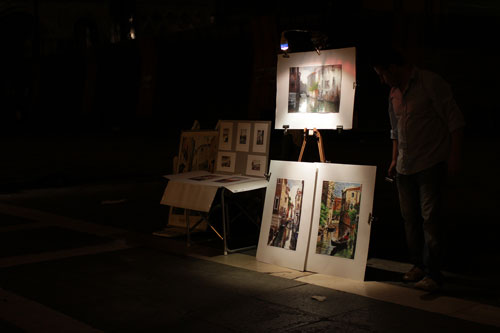
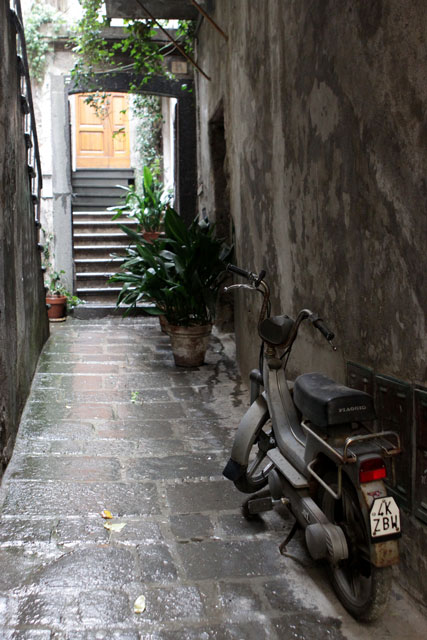
Or the lone traveller, trying to get someplace at night in Venice. People with umbrellas are quite the artistic staple, if you look at paintings through history.

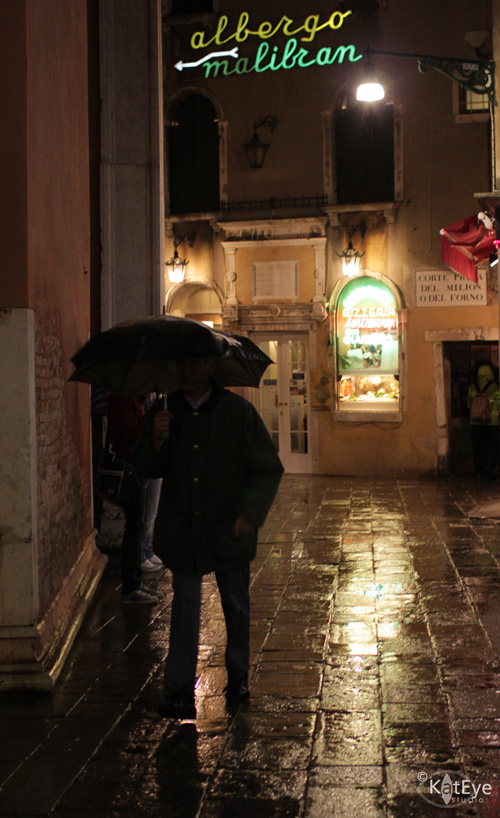
Here we have quite a few different elements that I love in one rainy shot… umbrellas, multiple reflections, at night, and it’s Venice. How could you go wrong?

There are so many ways I have yet to capture the rain, these are the images I’m still looking for:

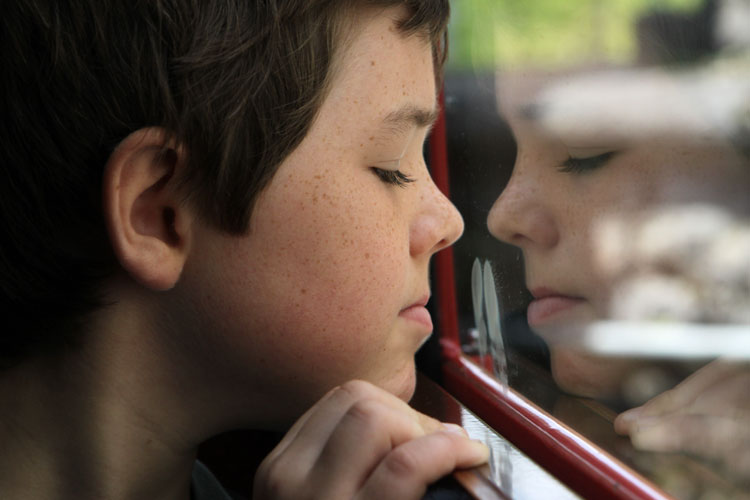
  • Looking out of a window covered in raindrops. Focus on the drops, with the scenery out of focus behind.
  • Rain spilling out of our very cool dragon-shaped rainspout or off the edges of eaves.
  • The rain in a downpour – I want to figure out how to capture the “look” of the world when you look through rain.
  • Drops of rain splashing in puddles – oh those perfect, rippling circles just tantalize me!

So, how do you do shoot in the rain without ruining your camera? Here are a few tips:

  1. Use an umbrella. If you have someone along with you, ask them to hold it over you and your camera when you shoot. If you don’t have that option (or don’t want to ask your companions to hold your umbrella every 15 seconds), a bigger umbrella works better than a small one for this “solo” technique: Rest the handle between your neck and shoulder with the umbrella resting on the top of your head. This will enable both hands to be free and your camera to be covered while you shoot. It does take some practice though!
  2. Find sheltering spots. Store awnings and overhangs, doorways, under trees, etc. can be great places to pause and have a little bit of protection from the rain while you shoot. Watch out under trees though – the drops might be less frequent but they are often bigger!
  3. Keep your camera protected between shots. Work out a system that enables you to quickly and easily but your camera in and out of your bag. I carry my camera across my body, and my camera bag the same way. I can take my camera in and out of my bag easily, so when it’s rainy I can put it away between shots but easily get it out for the next one. Another thing I will sometimes do, especially when it’s light rain, is just tuck the camera between my body and the bag. It’s mostly protected but easily accessible. When it’s heavier rain though, I keep it in the bag!
  4. Use a camera cover. You can buy rain covers for your camera, but I’ve found them to be kind of pricey and I don’t want something bulky I have to carry around “just in case” it rains. Another practically free alternative for an SLR camera is to use a plastic grocery bag (you know, the ones you get in just about any grocery store) and a rubber band. Tear a hole at the bottom of the bag near one corner, this is where you put the lens looking out. Use the rubber band to secure the bag at the end of your lens, then just wrap the bag up around the camera with the handles coming around the back. When you want to shoot, just open up the handles and hold the camera as normal inside the bag. It might look weird, but it’s cheap and easy, and a spare bag wrapped up with a rubber band does not take up much space in your camera bag.
  5. Don’t worry about a few drops of water on your camera. I don’t. A few drops on my equipment have never hurt anything – I just make sure that it doesn’t get completely wet. By keeping the camera mostly protected in the ways I’ve described above, my equipment has remained in good working order even if I shoot in rainy weather. Keep something soft and dry handy to wipe off the lens though, you will experience drips now and again!

Whatever you do – don’t just put the camera away when the clouds start rolling in. Enjoy the different photo opportunities that the rain provides.

Remember this motto – “When life gives you rain, take photos anyway!”

Filed Under: Exploring with a Camera, The Kat Eye View of the World Tagged With: Bath, England, Italy, Lucerne, Oregon, rain, Switzerland, umbrella, Venice

September 23, 2010 by Kat

Exploring with a Camera: Night Photography

Welcome to the last day of Six Days of Night! If you don’t have the bug to try night photography after this week, then I’m not sure I’ll be able to convince you. But if you do have the desire to try it out for yourself, today I have some information that will help get you started.

I discovered night photography about a year ago, in October 2009, on a trip to Florence and Tuscany. I’d taken the odd night photo here and there before this, and some even came out great, but it wasn’t until we began travelling in the winter months last year that I really fell in love with it. When you travel in the summer, you have these long days to run around and see everything. By the time the evening comes along, everyone is worn out and you head back to the hotel room as the light fades, especially if you have kids. In the winter, however, the days end early and you find yourself out and about in the darkness, seeing the world in a totally different light. Amazing, beautiful, atmospheric light that is like no other. And just like the quality of light in the daytime, which changes from place to place, the quality of light and atmosphere of places at night changes too. You’ve probably noticed that in the photos I’ve shared over the last few days.  The photo above is one of my first attempts at night photography, in Florence.

My definition of “night photography” covers a broad range of light. As soon as the sun goes down and the lights start coming on, to me that begins the night. This is the time that the flash would start automatically coming on in your camera or you might just put it away, if you are used to using natural light.

Let’s look at how light progresses from day to evening. This image of London is from very early evening. You can see that the sky is still quite light, but the phone booth is lit, the streetlights are on and the windows are starting to glow with light. There is still a lot of light at this time for your photos, but you start to get the warm glow that makes night photos something special.

The transition from day to night is called twilight or also the “blue hour” because you see the sky transition through a wonderful range of blue. The contrast of this blue sky with the warm yellow of artificial lights is especially pleasing, as in this photo from early evening in Split, Croatia.

Toward the end of the  “blue hour,” the skies are an amazing deep blue, as in the photo below taken the same evening in Split, just later. The blue also changes as you look toward the west, where the sun just went down, versus toward the east. You can see the variation in blue in the sky of this image below, from bottom right to top left. I can’t image a prettier blue color! No color adjustments done to this at all.

After a while, you will find yourself in full night, where the background skies are black. This has a completely different feel in the photo, all illumination is from the artifical lights around, as in this photo of Piazza San Marco in Venice.

Guess what? The blue hour happens twice a day, before dawn and after sunset. There is a great website, bluehoursite.com, that gives you the times of the blue hour for anywhere in the world on any day, so you can plan ahead!

Now that we’ve talked about light, let’s talk about how to use it creatively at night. There are so many ways to photograph the night! Looking through my photos last week I came up with lots of ideas. To start off, you know that reflections are one of my favorite things, whether the smooth as glass reflection of my favorite Venice photo (I had to slip this one in!), or the ripples of the bay in Split.

Reflections don’t only come from a large body of water at night as I’ve shown above. The pavement of the sidewalk, streets, rain… at night there are unending sources of light reflections. Not only are they cool to capture, but they increase the light available for taking photographs. Keep your eye out for them! We had a rainy night during our visit to Bath, and the reflections were so interesting. The really highlight the stone walkways and streets.

You might also note how yellow the light looks in the above photo, I did not do any adjustments to white balance to change how it came out in the camera. In my night shots I like the yellow glow of the lights, because that is part of the feel of night for me, although sometimes I do tone it down just a bit. You have to be careful when you adjust white balance on a night shot, because you can make the image look weird. The image below is an example. Left is out of the camera (quite yellow), Center is the color correction I like (still slightly yellow), and Right is over-corrected (no yellow left at all). While the flowers are white in the right one, that adjustment ends up creating an overall blue cast to the photo, and it no longer looks quite like night.

Night is a time for wonderful light bokeh. Since you often need to shoot with a wide open aperture to keep shutter speed down, you can capture the bokeh of lights in the background. This photo of the Chapel Bridge and the Lucerne water front is a good example. Since I’ve focused close to me, on the bridge, the waterfront behind is out of focus with nice bokeh. I’ve decided that I don’t use this effect enough, I need to play with it more in my night shots.

Watch for light pools or effects. Some of the paned windows in York provided wonderful shapes of light on the ground. I would love to go back and focus some shots just on those!

Night is also a wonderful time for silhouettes. Either from the fading light of twilight, or an artificial light source. The silhouette of the person walking by the bookstore in Padua, in the shot below, gives interest to the colorful background. And the strong light coming out the store front made this easy to get.

Strong light can also create shadows, sometimes in multiple directions at once if there are multiple light sources, like in this photo of my son’s legs and feet. Pretty cool! You don’t see this in the day, since we only have one sun. 🙂

Another great thing to capture at night is motion – in the form of blur. Because of the longer exposures you need, moving things will be blurred in your frame if the camera is still. You can also try to capture a moving object as still, with the background blurred to show motion, if you pan along with the moving object. This takes a lot of practice and trial and error. I don’t have any great examples of this, although I’ve tried, but the photo below from Venice shows the idea. I was on a moving boat, trying to get the bridge over the canal still while the rest of the photo was blurred. More practice is obviously needed, but hopefully you get the idea.

Sometimes, when you have just gone beyond the limits of any clear, in focus shot, just play. The photo below is from that same Vaporetto ride in Venice. Since I was moving on the boat, I played around with longer shutter speeds and intentionally moved the camera to get some cool effects. Kind of neat how the background buildings are still clear and “still” while the bright lights are moving – completely unplanned.

And finally, don’t be afraid of the dark. This is night, you can have large areas of your photo completely black and still have an amazing photo. Throw away the idea of the the entire frame being exposed when you are shooting at night, and just go for your focal point. It can create a dramatic image, like this one, another all-time favorite of mine from Venice.

My main mode of operation is to handhold my camera for night shots. I just am not willing to haul a tripod around with me all day so that I can have it handy at night, so big and cumbersome. So I’ve learned quite a bit along with way that I can share with you for optimizing your ability to get good “Handheld” night shots. (By the way, these will work in any low light situation, such as indoors, not just as night.) Tips for “Handheld” night shots:

  1. First off, turn off your flash! Turn your camera to a mode that won’t allow the flash to come on.
  2. Camera shake is your biggest enemy here – just the movement of you holding the camera while the shutter is open. A rule of thumb to avoid camera shake is that the shutter speed should be no slower than 1/[Your zoom setting]. So if you are at 50mm zoom, your shutter speed shouldn’t go below 1/50. At 35mm, shutter speed of 1/30.
  3. Increase your stability by taking a wide stance with your feet, tucking your elbows tight into your sides, and hold your breath while you take the shot. I can sometimes get good shots down to 1/20 or 1/15 with this method. You can also lean against a pole or the side of a building for increased stability.
  4. You can also increase your stability with an “assisted handhold” – use anything stable around, like a railing or bench or fence, and use that to help hold your camera. I put my hand under the lens, spreading my fingers and moving them around, to support the camera with the right angle. I also have to plan for more straightening and cropping in these shots, because you don’t have as much control. Most of my Venice canal shots were done with the assitance of a bridge railing for stability. Another option that is less cumbersome than a tripod but provides more stability is a monopod.
  5. Set your camera on Aperture Priority, with the setting as wide open as it will go. This will help keep your shutter speeds as fast as possible.
  6. Or, set your camera on Shutter Priority, to a reasonable shutter speed. I often do this to set it at 1/50 when we are just walking around a town. I’ve found that this setting works consistently well for avoiding camera shake on the go, and it forces the camera to choose the best aperture for the exposure. This works when my camera is choosing slower shutter speeds but not using the full aperture range of my lens.
  7. My last resort is to bump up my ISO setting. This is one of the most wonderful things about digital, that we can adjust our ISO setting, instead of being stuck with whatever is set for the film that is loaded. When you’re wide open on aperture and your shutter speed is still too low, then increase the ISO setting. I kind of think of ISO increase as a last resort, because with every increase to ISO you also increase the noise. I purchased my current camera (Canon Rebel T1i) partially because of the increased ISO range, 3200 and beyond, but the more I’ve gotten into night photography the more I realize that I would rather not use the ISO settings higher than 800 if I can avoid it. But – when faced with either not getting the shot or having a noisier shot – I’ll always choose to get the shot, even with the noise.
  8. If all else fails, underexpose. By underexposing, you can drive your camera to shorter shutter speeds. As long as you don’t underexpose so much that you lose the vital pixel information of your focal point, you can compensate exposure in the computer using software.  I’ve learned that I can easily underexpose 2/3 to 1 full stop on night photos and recover them in post processing.
  9. Constantly check your settings, especially shutter speed, if your camera is in an auto mode for exposure. You have to be aware of them as you shoot at night, even more so than you might normally, because the lighting conditions change so much from place to place.
  10. Always take multiple shots, because with several you might get one that one perfect one. There is a lot more room for error with night photography. And happy accidents too! Review in camera using the zoom feature, because sometimes a shot might look perfect on your tiny screen only to have some camera shake when you view it larger on your computer.
  11. Finally, if you just reach the limits of your equipment and don’t want to go the tripod route, there is nothing that can help your handheld night photography more than upgrading your equipment for a lens with a wide aperture. Night photography is one area where your equipment really does come into play a bit more, so you will have to experiment and find the limits of your camera/lens combo.When night comes, I switch to my 35mm f/1.4 lens. This has given me an extended range of light I can work with at night. Consider trying out a 50mm f/1.8 lens as an inexpensive first step into this arena, if you have a dSLR. And if you have a point-and-shoot, well… you might want to think about a dSLR or use a tripod.

As I’ve progressed further with night photography, and especially after my photo lesson in Paris, I can really see the benefit of the tripod. You can decrease your ISO and increase your shutter speeds significantly and take your camera limitations mostly out of the equation. The cost of it is carrying the tripod, so for me, I see this as an option when I am intentionally travelling to photograph rather than when I photograph as I travel (the latter is my normal mode of operation). Tips for “Tripod” shots:

  1. You need a good stable tripod that will not move with normal winds and can hold your camera. My 24-70mm lens is a big one and so most of those little, compact tripods you can buy won’t work for my camera. Also recommended with a tripod are a quick release feature (where you don’t actually screw the camera into the tripod, but into a piece that you can easily connect and disconnect from the tripod) and a level that can help you keep your camera straight (something I need!). There are multiple types of adjustments available, but you want to make sure that you can do both horizontal and vertical orientation easily. There are so many types of tripods out there, if you can visit a store and try them out with your camera before you buy, that is recommended. I have a simple tripod that is strong enough to hold my camera stably, has quick release, but is as light as I could manage.
  2. Ensure flash is off.
  3. Set your ISO lower, to reduce noise. Try as low as the camera will allow you to set it, and work up from there as needed.
  4. You have more flexibility in your aperture and shutter speed settings, so play around here. You might still want to set your aperture wide open, to reduce the shutter speed, just to avoid really long exposures you will need for a low ISO setting. You are still subject to camera shake with a tripod, just less so. The longer the shutter is open, the more likely you are to have an issue.
  5. Use a remote shutter release. You can still shake the camera on a tripod just by pressing the shutter. Remote shutter releases (cable or wireless) are available inexpensively for many cameras. This removes you completely as the source of the camera shake.
  6. Use your camera self timer. Another option, if you don’t have a remote shutter release, is to use the self timer feature that most cameras have these days. This doesn’t work so well, however, if you are trying to time the shot with movement in or out of the frame. For example, in many of my Paris shots, I had to be ready to shoot as soon as my frame was clear of people. If I used the self timer, I could never have been able to hit the shutter such that 10 seconds later the frame was clear.
  7. Again, review, check your settings and take multiple shots. Once you get everything set up perfectly, you don’t want to be disappointed if you discover on the computer that it was slightly out of focus. It’s hard to use manual focus at night, so I use auto focus as much as possible but that isn’t always fool proof either.

If you stuck with me here to the bitter end you must be ready to start exploring night photography. And guess what – here in the northern hemisphere the days are getting shorter and the nights longer, so you’ll have plenty of opportunities in the coming months. The Flickr group is available to post your shots, but I think I’m also going to mix it up a little bit to see if I can increase the sharing. Next week come back on Thursday and you can add a link to your night shots (blog or website or Flickr, anywhere with a web address to your specific shots) to share with the rest of the readers here too. Won’t it be fun to go blog hopping and see what everyone else has captured in the night? I can’t wait to see your view!

Filed Under: Exploring with a Camera, The Kat Eye View of the World Tagged With: Bath, blue hour, Croatia, England, evening, Florence, Italy, London, Lucerne, night, photography, reflection, six days of night, Split, Switzerland, Venice, York

September 20, 2010 by Kat

Six Days of Night: Lucerne

Night is a wonderful time to catch little details, illuminated with soft light. In wandering around Lucerne one evening, I saw this waterfront restaurant, tables set up for the night. Candlelight is a wonderful source of nighttime illumination. A simple candle on a table transforms the scene, giving warmth to the black and white color scheme.

Reflections of light in water are also one of my favorite things at night, I am always drawn to town waterfronts. It seems many people are too, as waterfronts are often places lined with restaurants and benches, foot bridges and plazas. The chapel bridge in Lucerne is fun to photograph any time of day, with it’s long lines, flowers and repeating patterns. But at night, add in the reflected light in the water and it is something special. In this image, I like how the blue of the sky is reflected in the water, giving an overall blue contrast for the lights.

Are you enjoying the “Six Days of Night” so far? I am! I can’t believe we’re already halfway through. I wonder what town will be next? Join me tomorrow to find out!

Filed Under: The Kat Eye View of the World Tagged With: bridge, cafe, Lucerne, night, reflection, river, six days of night, Switzerland, table

August 11, 2010 by Kat

The Power of Photography

On our recent travels I’ve had the opportunity to see a number of photography exhibits. Some of these were planned visits, others I just happened upon, but they all show the power of photography in different ways. I love uncovering and discovering all of the different ways that photography can impact us, deepening our experience in the world around us.

In my visit to the Rosengart Collection in Lucerne, I had the opportunity to see the photos David Douglas Duncan took of Picasso. Duncan, a photojournalist, became friends with Picasso and captured some extraordinary images of ordinary moments in Picasso’s life. The thing that struck me was the humor and zest for life that Picasso had, it just comes through in the images of him in his home, interacting with his family and his art. How powerful is that, to capture the artist that created the art, and to get a glimpse of the personality? It makes my understanding of Picasso and his work so much deeper. I don’t have any pictures of the exhibit, but you can see many images of Picasso by Duncan on the web here.

As we explored the Swiss countryside around Gruyere, we stopped at the Musee Gruerien folk museum, where they just happened to have an exhibit of the photography of Emmanuel Gavillet, a modern Swiss photographer. The subject was Gastlosen – the Swiss “Rocky Mountains.” All black and white, shot with an 8×10″ film camera, the images were beautiful in their capture of contrast and texture. The display also showed some elements of the 8×10″ camera, which were helpful to explain aperture and film to Brandon, who is fascinated by the workings of my camera and the idea of “film” is completely foreign to him. The images, printed large and on the wall, were powerful. They were images full of quiet grace, showing the timelessness of nature. A reminder that photographs are at their best when viewed large, they are truly art.

The city of Lausanne has one of the first museums in Europe dedicated to photography, the Musee de L’Elysee. The current exhibit is reGeneration2, an exhibition of 80 young photographers (in art school) from 30 countries in North America, Asia and Europe. I was struck by the sheer variety of it all… from people to architecture, from candid moments to studio, from black and white to color, from film photographs to digital collage, even shape (see round photos, in image shown above). Some of the photography I loved, some I didn’t like, but it all reaffirmed my belief that we all have a unique vision to show the world. Art is personal, so for every person that doesn’t like our art, there is someone who will. We need to keep showing our personal vision, developing our own style. Regain the irrepressible confidence of youth, the belief that you can do anything, that these photographers show.

While wandering the waterfront in Geneva, we ran into a photography exhibit called “Chernobyl: 25 Years After the Catastrophe.” Powerful images from Guillame Briquet, showing the area surrounding Chernobyl today. He captured the decay of the human creations and the rebirth of nature left to itself, even in the wake of such a damaging event. What a contrast, against the backdrop of the festive carnival also happening along the lakefront. The most striking images for me were the ones that showed the evidence of lives interrupted. Just left behind. And the saddest part? It was too late for most of the people in the town of Pripyat to survive, since they were evacuated a full day after the accident because of the extreme radiation to which they were exposed.
This exhibit showed the power of photography to teach us about history, to remind us of events of the past and the longer term ramifications. To teach us about what the human ego can do, when left unchecked. Photography has the power to keep the world honest.

Finally, last weekend back in my home area of Milan, Italy I found the exhibit of Alberto Bortoluzzi‘s 24+1 Cinema Chairs Project. What a delightful find this was! Finding an old movie theater chair in the dump, Bortoluzzi was struck by the disappearance of these chairs for their cushy, higher tech cousins. He began wondering about the stories that old movie theater chairs might tell, and started to find and document these chairs. He then contacted filmmakers for their memories of the cinema and the result is a powerful essay on the history of film, through the images of these chairs and the words of the people who helped create the films. A first for me, I actually made a beeline to the bookstore and purchased the book of the project so that I could enjoy the images and stories at my leisure. Bortolozzi’s work shows the power of photography, when paired with stories, to capture something greater than the image itself. To create something wonderful and new.

Photography is amazing, isn’t it? We need to move it from the computer screen and onto the wall. We need to experience it larger than life, as a part of our physical environment. If you can, take the opportunity to go see an exhibit in person soon, and share what you learn! As for me, I think I’m going to figure out how to view some of my photos, live and in person.

Filed Under: The Kat Eye View of the World Tagged With: art, Bulle, creative, exhibit, Geneva, Italy, Lausanne, Lucerne, Milan, museum, photography, Switzerland

August 5, 2010 by Kat

Exploring with a Camera: Reflections in Glass

I’m so excited for today’s exploration! The “Exploring with a Camera” series is about seeing things around you in a different way. To get good photographs, you first have to see, like I discussed in Monday’s post. Today we’re looking at capturing images with Reflections in Glass.

Reflections in glass are so cool because the image you see is not a direct image of a subject. What’s behind and around the glass changes the images, and the reflection itself often softens and distorts the subject.

Below is an example from our recent stay in Lucerne, Switzerland. In this image, the only “direct” image you are seeing is straight through the walkway. The rest of the arches and store windows are reflections. See the people on the right? They are really on the left, not directly visible to the camera, but in the reflection they have a “ghost image” quality. It’s like an optical illusion, but it’s just looking down a corridor lined with glass.
To get this image I moved around and took photos from several different angles and at different times with varying amounts of people. When I took this specific shot, I didn’t even notice the people visible in the reflection on the right because I was focusing on the “direct” part of the image being free of people.

Here is another example, of my son looking out of a train window. The reflection draws your eye to his profile. Look at it for a while and you start to see the symmetric shape between the two profiles. You’ll also notice that the key areas of his face in the reflection – eyes, nose, lips – are clearly visible while the other parts are modified by what is seen out the window.

If there is something immediately behind the glass, you can get really cool effects in your reflections. The security door immediately behind the glass in this photo enabled me to get an uninterrupted scene of the reflected street in Lucerne but with a really unique texture.

A reflection can completely change a setting. Without the reflection of me and my family, the image below would be just another doorway to a modern building. Nothing of note that I would routinely photograph. With the reflection, it becomes a family portrait with a sense of place – you can see the wording above the door is in Spanish (we were in Barcelona) and the funky tube things draped across the top show part of the science museum we were entering. Notice how everything in the photograph seems to draw your eye to the center, where the reflection is. Also notice also the cool “double” effect with our reflections because the entrance had two sets of glass doors.

Here is another reflection of an entrance, a self-portrait of me at our apartment building in Italy. I love the sense of place that is achieved by what is reflected in the background, along with the tiny little suggestion of what is behind the door. Not a huge fan of my pictures of myself (who is?), I also like how the reflection softens my image so that I don’t focus on all of the things I immediately see as “flaws” in a regular photograph. Maybe I’m able to better see the real me, as others see me, because it’s a reflection.

And, just a reminder, glass is just not windows and doors! Here is a wine bottle, but in it there is a reflection of me and my family along with the buildings across the street in Nice, France. The subject here is the bottle, but the reflection adds interest.

Tips for getting your own images of reflections in glass:
1. Look for indirect light on both sides of the reflection. In reviewing pictures for this topic I realized that the most interesting reflections have indirect light as the main light source – either in shade or cloudy day or evening light. When there is a direct or strong light source on either side of the glass you will not get the kind of reflections I’m showing here.
2. Look in and Look out. Keep you eye out for reflections on both sides of the glass, whether you are indoors or outdoors. When you see the reflection, also notice what you see through the reflection. That can make or break the image! It’s easy to focus so much on the reflection that you don’t see something distracting on the other side.
3. Change your perspective. If you see a cool reflection, move around and photograph it from different perspectives and compositions. Because of the way you can often see what’s on both side of the glass, you may find a more interesting composition, or even a different reflection, if you move a few steps to the left or right than where you first noticed the reflection.
4. Look for reflections in all kinds of glass – not just windows. When you start to see these, you will notice that glass is everywhere, in all shapes and sizes and colors.

Have fun seeing all of the reflections in glass around you in a whole new way! I would love to see your explorations in this topic, post a link here in the comments or join the Flickr group to share.

Filed Under: Exploring with a Camera, The Kat Eye View of the World Tagged With: glass, Lucerne, photography, reflection, Switzerland

August 4, 2010 by Kat

Beads of Fog

What happens when it’s cloudy and foggy on the mountaintop you visit? What happens when you look out and around and all you can see is a soft white? You start to notice the little details, close at hand. The way the fog beads up on the alpine grasses and flowers, like little crowns.
The softness of the light and the splashes of color of the wildflowers against the patina of the tundra.
The way the fog fades into the distance, providing a perfect backdrop to capture shining edges of nature’s summer blanket in the Alps.

Who needs grand vistas, anyway?

(Photos from Eisel Peak on Mt. Pilatus, Switzerland.)

Filed Under: The Kat Eye View of the World Tagged With: Alps, flowers, fog, Lucerne, mountain, nature, Pilatus, Switzerland

  • Email
  • Facebook
  • Instagram
  • RSS
  • Twitter

Upcoming Events

Books Available

  Digital Photography for Beginners eBook Kat Sloma

Annual Postcard Swap

Online Photography Resources

search

Archives

Filter

  • Email
  • Facebook
  • Instagram
  • RSS
  • Twitter

Upcoming Events

© Copyright 2017 Kat Eye Studio LLC