Welcome to February’s installment of Exploring with a Camera! In this exploration we’re going to be looking at Silhouettes — how to capture and effectively use them in your photographs.
Lately, if I have my camera in my hand, it’s because I’m seeking the silhouettes of the trees against the early morning or late evening sky. Perhaps it’s because we’ve had an unusually clear winter here in Oregon, or maybe it’s just what I’m noticing now, but the shapes of the trees against the sky have been fascinating me. Have you ever noticed how different each type of tree looks in silhouette?

Silhouettes are all about shape. You take all dimension, all form, out of an object when captured in silhouette. This can be challenging, since you have to learn to see the shapes, and how they merge together, in order to compose your photograph. You may not realize how much information your brain infers from the knowledge of a 3D form until you distill it down into the 2D shapes using silhouettes. Not only that, but exposure when capturing silhouettes is not always straightforward. This makes exploring silhouettes a great learning opportunity!
Elements of an Effective Silhouette
Chances are, you achieve silhouettes in your images all the time without even thinking about it. There are a few elements that you need to create an effective silhouette in an image:
- A light source behind your foreground object(s) in silhouette. The light source can range from back light to almost being side light, but the more directly behind the object the light is, the more of a silhouette you will achieve. The light doesn’t have to be particularly strong or directional, as shown in this example of my husband and son peering into an aquarium window.

Even in side light, you can at times achieve a strong silhouette but some of your object may be highlighted. (See Exploring with a Camera: Rimmed with Light for an exploration of side light.) In this example below, even though it is full daylight and the light is a bit to the side, my son is a silhouette against the sky.

- You need strong contrast between your object in silhouette and background. The background needs background to be lighter than the object in silhouette. The more contrast, the more the silhouette shape will pop. In this example, the tree is strongly contrasted against the morning fog. Converting to black and white increases the contrast, making the detail of the tree branches clearly visible.

Reflections of light off of surfaces, like water or pavement, can enhance the contrast. The silhouette of this boat in the Venetian lagoon is created using water as the backdrop.
- You need a recognizable shape. Unless you are working to create an abstract image, you have to pay close attention to the shapes of the object in your foreground. Multiple elements will blend together to get one shape when seen in silhouette. Being able to recognize how the shapes blend with each other and interact with the background is an important part of achieving a silhouette. In this moment of connection captured, it was important to ensure the figures weren’t merged so much as to not be recognizable. The space between their feet and the shadow helps keep the shape identifiable.

A complex shape can be made more recognizable by effectively using any openings. In the case of the image below, the openings make the shipwreck on the Oregon coast an effective and recognizable silhouette.


Exposing for a Silhouette
Exposing to achieve a silhouette can be tricky. In-camera meters seek to achieve an average “mid-tone grey” exposure across the frame. When you have strong contrast of dark and light, as in the case of a silhouette, the camera will often choose settings that overexpose – making the background too light and capturing detail in the silhouetted object you may not want.
Since you want the contrast of black silhouette (with no detail) on light background (with most of the detail), you will want to underexpose relative to the camera’s meter reading. Depending on your lighting situation, you may need to underexpose 1 to 2 stops. If you manually choose your settings, this is straightforward. If you use the automated settings on your camera, there are a couple of ways to underexpose:
- Use Auto-Exposure (*AE) Lock. With this feature, you aim your camera so that the background fills the viewfinder, lock the exposure, then recompose your image with the silhouette where you want it. When you press the shutter the camera focuses and takes the picture, but the exposure was set when you locked it. The exposure resets each time you take the picture.
- Use Exposure Compensation (+/-Av). With this feature, you choose how much you want to underexpose your image, such as -2/3 or -1 stop. When you press the shutter button, the camera focuses and meters the exposure, then compensates the settings to underexpose as you instructed. This setting remains each time you take the picture, until you change it.
Revisit your camera manual to get the details on how to use these settings for your camera.
Capturing a stained-glass window, such as this gorgeous one found in Heidelberg, Germany, is the kind of situation where you will struggle if you rely on the camera’s automated settings. The camera’s attempt to get an average mid-tone grey across the frame would result in the window being completely “blown out,” or overexposed, with no detail. By underexposing relative to the camera’s meter, exposing for the windows only, you allow the dark areas to be black and you capture the detail of the windows.

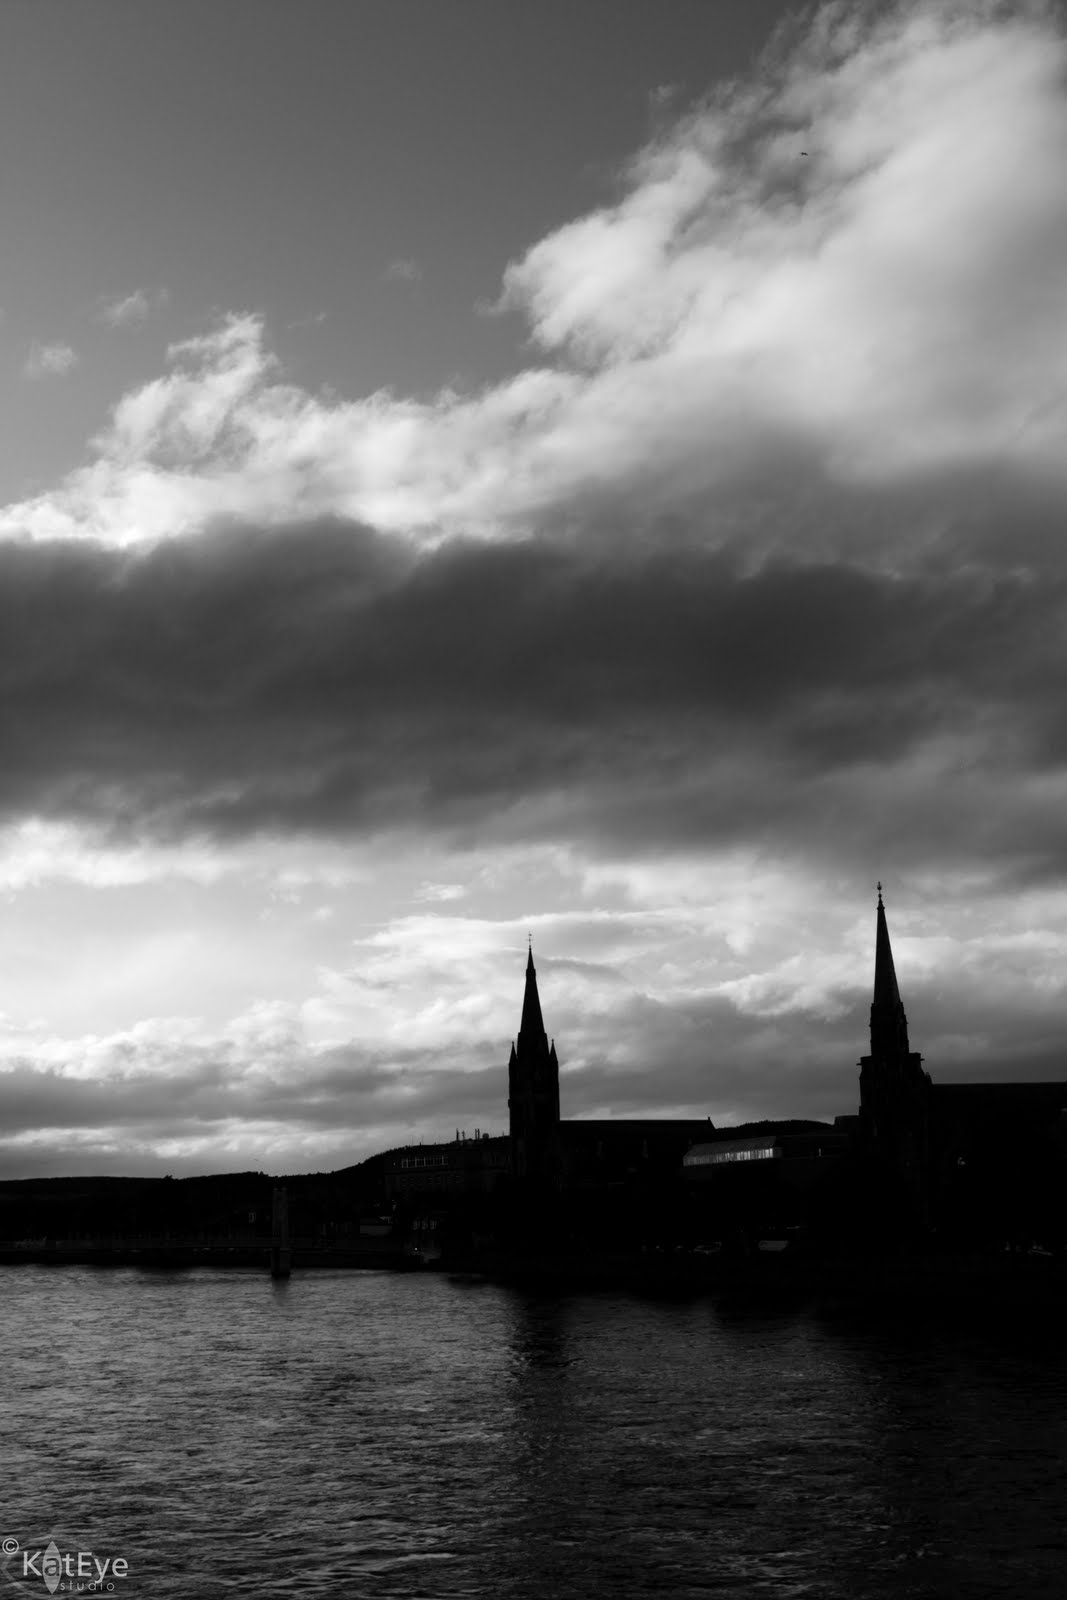
You can also adjust your image in post-processing to increase the silhouette effect. If I still have detail in the dark areas, I will darken the shadows in order to increase the overall contrast. I may also lighten the background, but that can in turn begin to reveal detail in the silhouette you don’t want. It’s a give and take, so play around in your post-processing to see what you can do to create silhouettes. In the image below, taken in Salzburg, Austria, I exposed to achieve a silhouette in the towers against the sky, but still had some visible detail in the foreground next to the river. In post-processing, I increased my contrast by darkening the shadows, which created a more uniform black silhouette throughout the image.

Using Silhouettes
Silhouettes can be used as the subject of an image, as in the case of many of the examples already shared, or to set off other elements by their contrast. For example, in this image from the Amalfi Coast of Italy, the silhouette grounds the image and provides contrast for the interesting light in the sky and on the water.

In this image from Venice, the silhouette of the Bell Tower serves as a backdrop, enhancing the sense of place fo the lamp. It’s a simple image, yet it screams “Venice” to me due to the inclusion of the silhouette in the background.

There is something appealing to me about the simplicity of distilling an object down to its shape. I find the emotional impact is greater by the simplification a silhouette provides. The image of the couple in embrace becomes “love” or my son with his hands thrown wide becomes “joy.” A silhouette turns an object into a graphic representation, cutting to the essence and imparting a different meaning than if the object were seen in full light.
I hope after reading this you have become as fascinated by silhouettes as I have been lately. Look through your archive, or go out exploring with your camera to find new silhouettes and come back here to share. This link up will remain open through 24 February. I can’t wait to see your silhouettes!