
[Author’s Note: This post finishes up the “Second Edition” Exploring with a Camera posts I’ve been doing this summer. In addition to the link up at the end of this post and the sharing in the Flickr pool, for this topic I am creating a special “Night Photography” camera companion that will come in Sunday’s email newsletter. Don’t miss it! You can sign up for the newsletter here.]
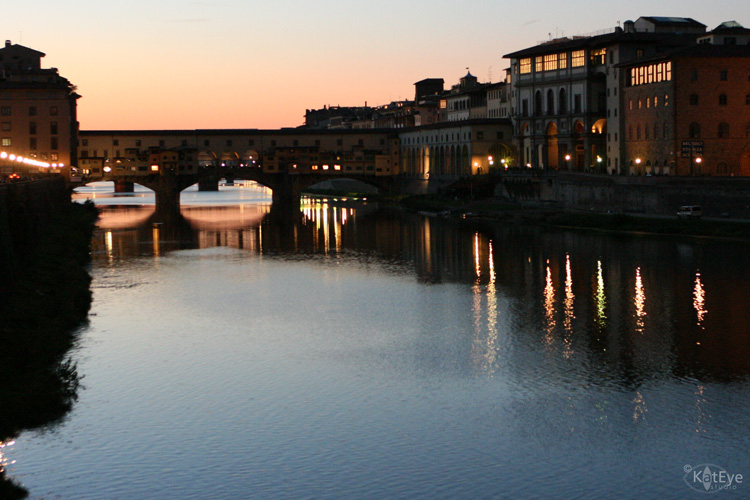
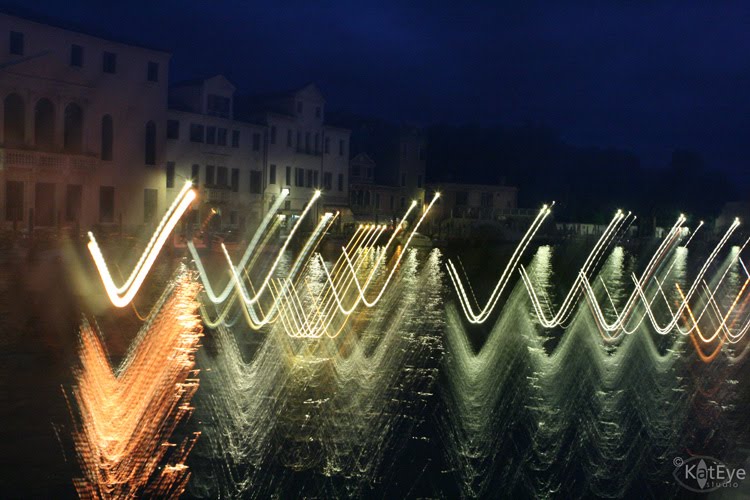
I discovered night photography about a year ago, in October 2009, on a trip to Florence and Tuscany. I’d taken the odd night photo here and there before this, and some even came out great, but it wasn’t until we began traveling in the winter months that year that I really fell in love with it. When you travel in the summer, you have these long days to run around and see everything. By the time the evening comes along, everyone is worn out and you head back to the hotel room as the light fades, especially if you have kids. In the winter, however, the days end early and you find yourself out and about in the darkness, seeing the world in a totally different light. Amazing, beautiful, atmospheric light that is like no other. And just like the quality of light in the daytime, which changes from place to place, the quality of light and atmosphere of places at night changes too. You can see this in the photos I shared as part of my Six Days of Night series last year. The photo above is one of my first attempts at night photography, in Florence.
My definition of “night photography” covers a broad range of light. As soon as the sun goes down and the lights start coming on, to me that begins the night. This is the time that the flash would start automatically coming on in your camera or you might just put it away, if you are used to using natural light.
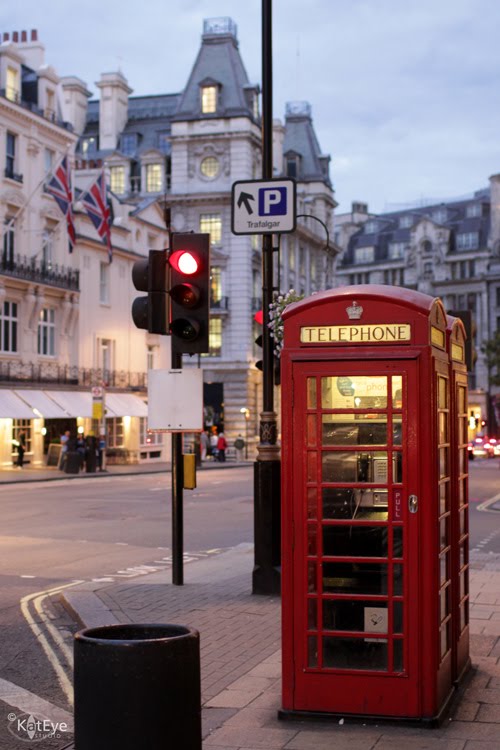
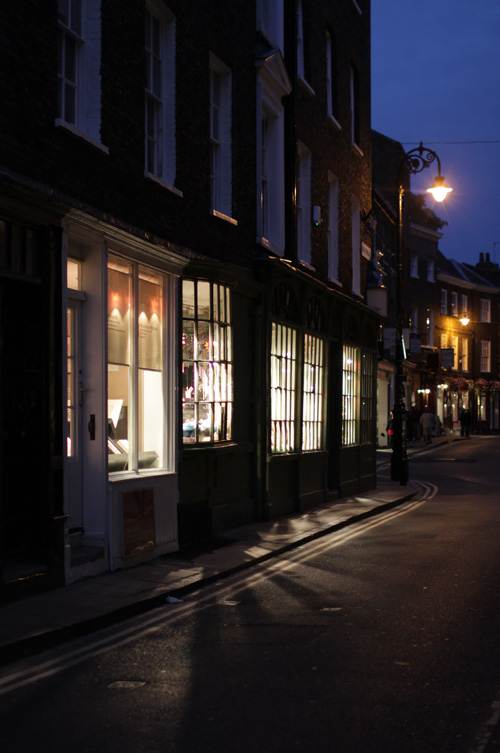
Let’s look at how light progresses from day to evening. This image of London is from very early evening. You can see that the sky is still quite light, but the phone booth is lit, the streetlights are on and the windows are starting to glow with light. There is still a lot of light at this time for your photos, but you start to get the warm glow that makes night photos something special.
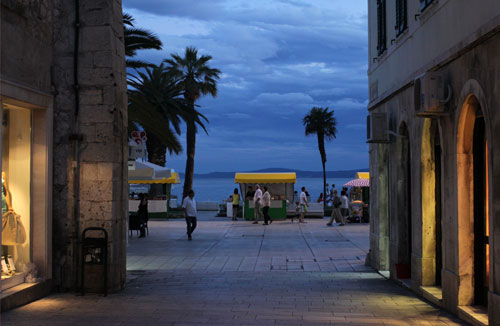
The transition from day to night is called twilight or also the “blue hour” because you see the sky transition through a wonderful range of blue. The contrast of this blue sky with the warm yellow of artificial lights is especially pleasing, as in this photo from early evening in Split, Croatia.
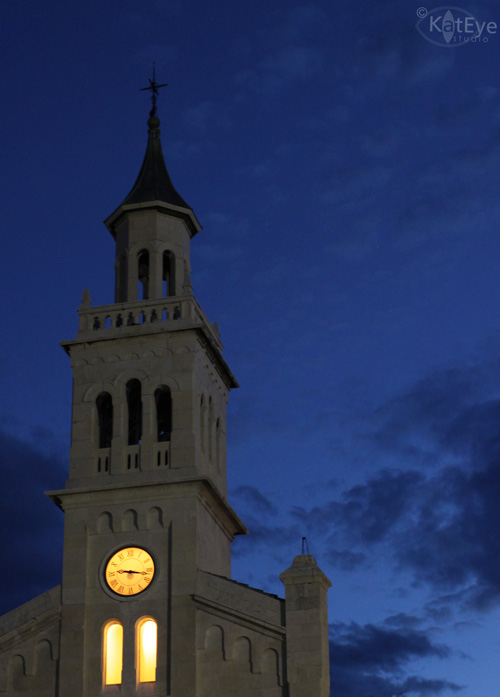
Toward the end of the “blue hour,” the skies are an amazing deep blue, as in the photo below taken the same evening in Split, just later. The blue also changes as you look toward the west, where the sun just went down, versus toward the east. You can see the variation in blue in the sky of this image below, from bottom right to top left. I can’t image a prettier blue color! No color adjustments done to this at all.
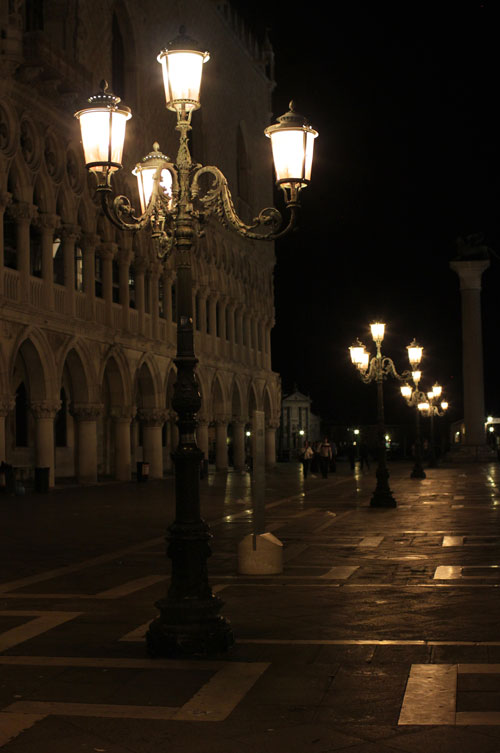
After a while, you will find yourself in full night, where the background skies are black. This has a completely different feel in the photo, all illumination is from the artifical lights around, as in this photo of Piazza San Marco in Venice.
Guess what? The blue hour happens twice a day, before dawn and after sunset. There is a great website, bluehoursite.com, that gives you the times of the blue hour for anywhere in the world on any day, so you can plan ahead!
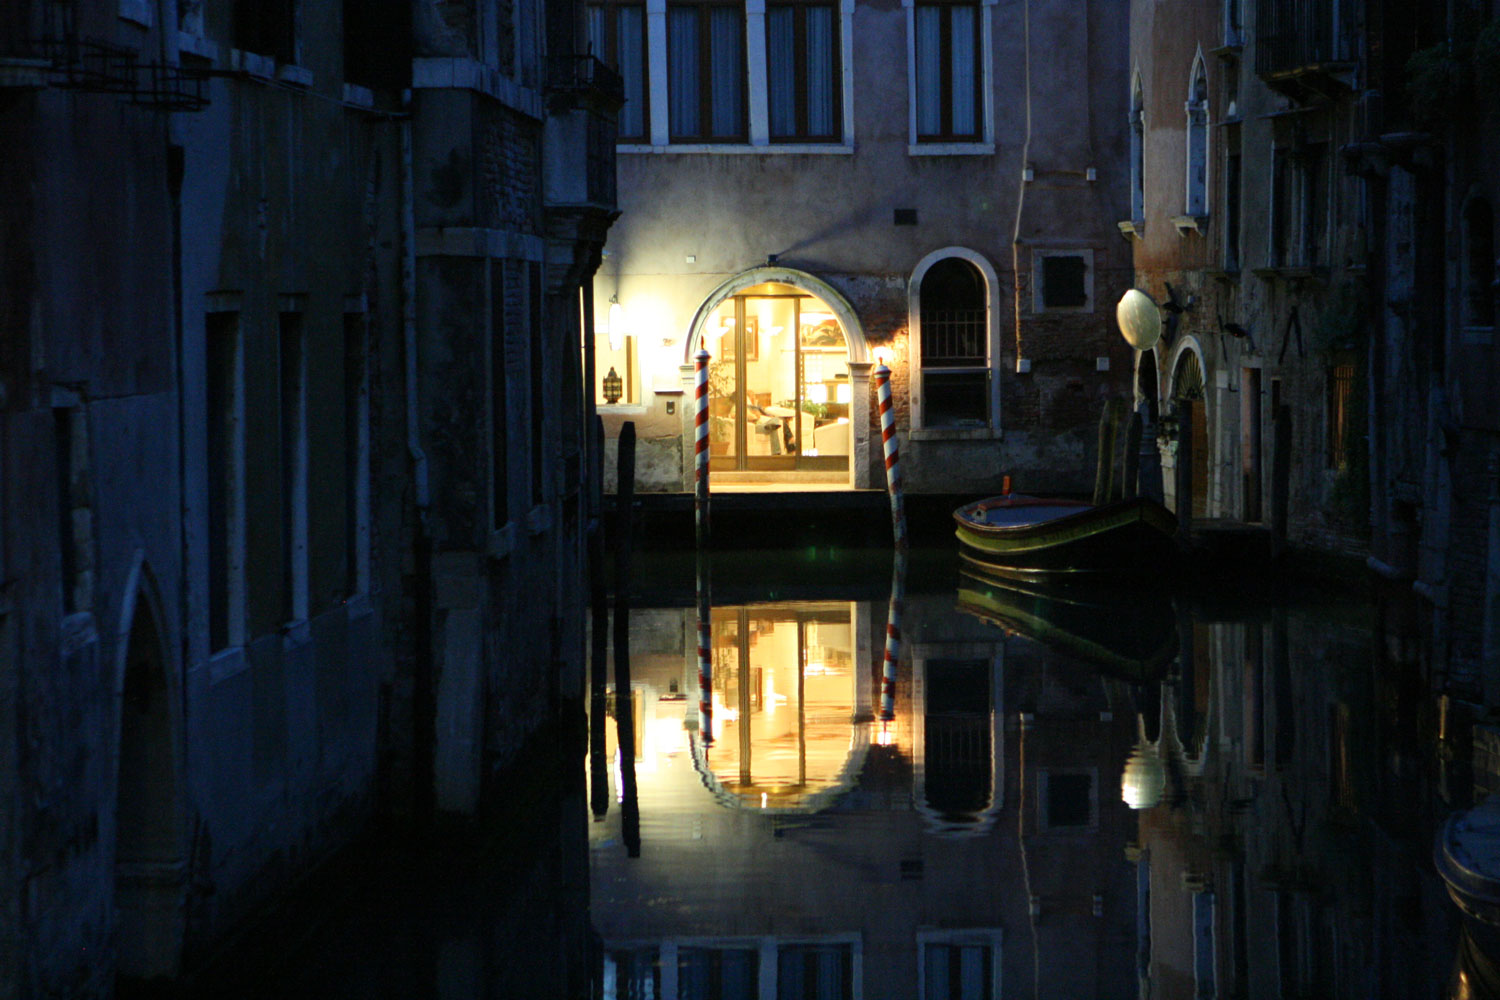
Now that we’ve talked about light, let’s talk about how to use it creatively at night. There are so many ways to photograph the night! Looking through my photos last week I came up with lots of ideas. To start off, you know that reflections are one of my favorite things, whether the smooth as glass reflection of my favorite Venice photo (I had to slip this one in!), or the ripples of the bay in Split.

Reflections don’t only come from a large body of water at night as I’ve shown above. The pavement of the sidewalk, streets, rain… at night there are unending sources of light reflections. Not only are they cool to capture, but they increase the light available for taking photographs. Keep your eye out for them! We had a rainy night during our visit to Bath, and the reflections were so interesting. The really highlight the stone walkways and streets.
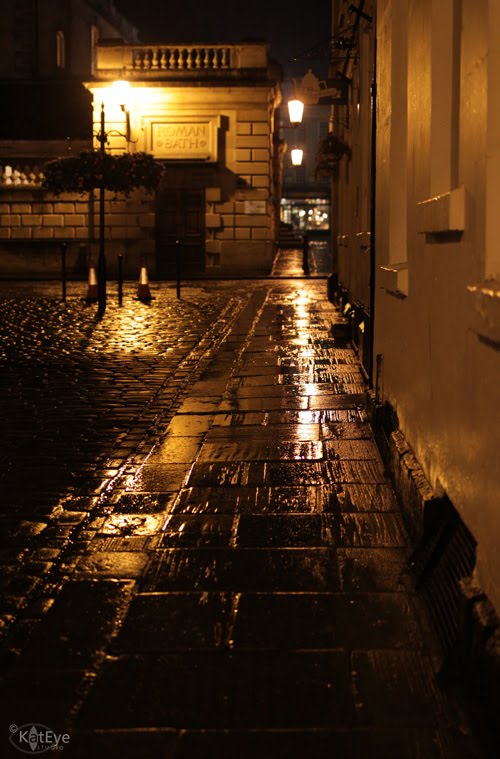
You might also note how yellow the light looks in the above photo, I did not do any adjustments to white balance to change how it came out in the camera. In my night shots I like the yellow glow of the lights, because that is part of the feel of night for me, although sometimes I do tone it down just a bit. You have to be careful when you adjust white balance on a night shot, because you can make the image look weird. The image below is an example. Left is out of the camera (quite yellow), Center is the color correction I like (still slightly yellow), and Right is over-corrected (no yellow left at all). While the flowers are white in the right one, that adjustment ends up creating an overall blue cast to the photo, and it no longer looks quite like night.

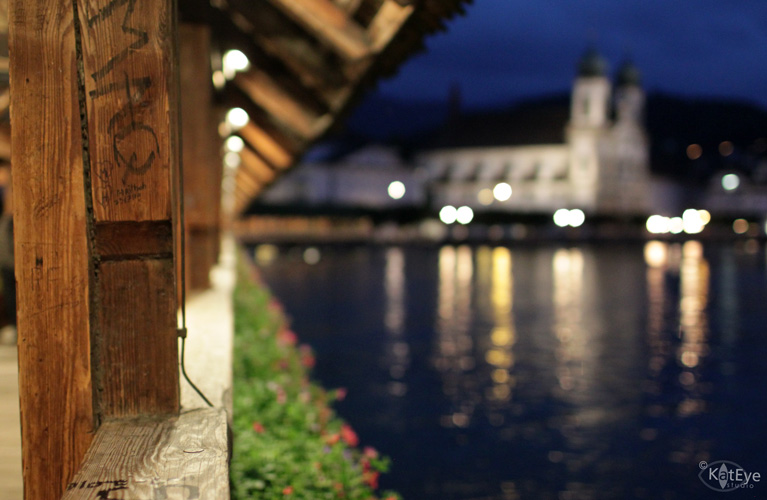
Night is a time for wonderful light bokeh. Since you often need to shoot with a wide open aperture to keep shutter speed down, you can capture the bokeh of lights in the background. This photo of the Chapel Bridge and the Lucerne water front is a good example. Since I’ve focused close to me, on the bridge, the waterfront behind is out of focus with nice bokeh. I’ve decided that I don’t use this effect enough, I need to play with it more in my night shots.
Watch for light pools or effects. Some of the paned windows in York provided wonderful shapes of light on the ground. I would love to go back and focus some shots just on those!
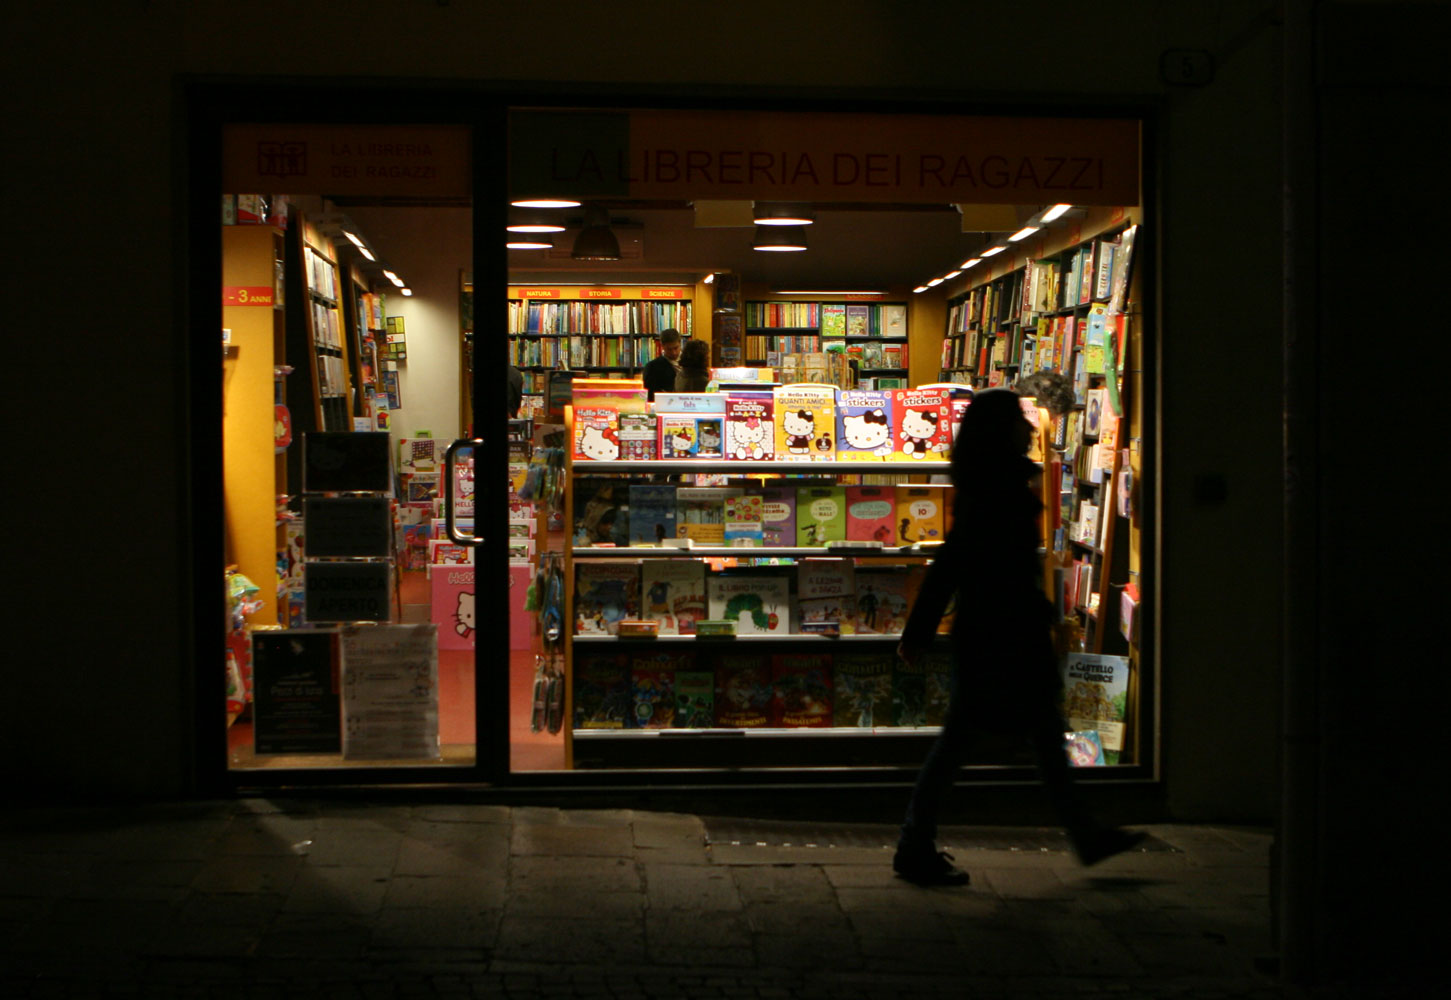
Night is also a wonderful time for silhouettes. Either from the fading light of twilight, or an artificial light source. The silhouette of the person walking by the bookstore in Padua, in the shot below, gives interest to the colorful background. And the strong light coming out the store front made this easy to get.
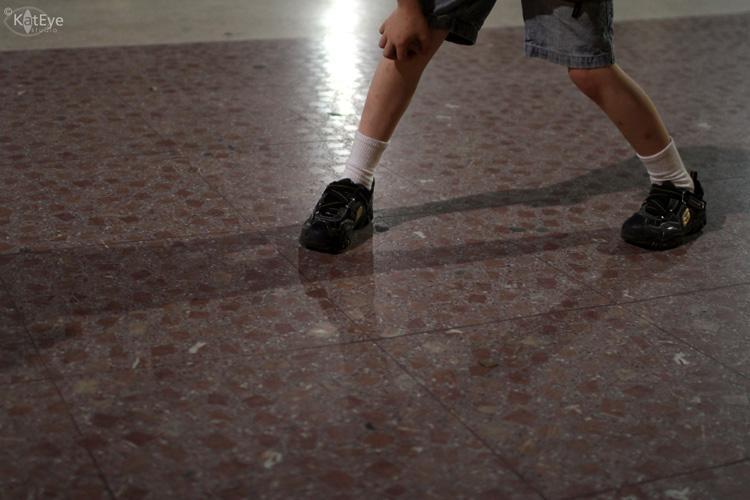
Strong light can also create shadows, sometimes in multiple directions at once if there are multiple light sources, like in this photo of my son’s legs and feet. Pretty cool! You don’t see this in the day, since we only have one sun. 🙂
Another great thing to capture at night is motion – in the form of blur. Because of the longer exposures you need, moving things will be blurred in your frame if the camera is still. You can also try to capture a moving object as still, with the background blurred to show motion, if you pan along with the moving object. This takes a lot of practice and trial and error. I don’t have any great examples of this, although I’ve tried, but the photo below from Venice shows the idea. I was on a moving boat, trying to get the bridge over the canal still while the rest of the photo was blurred. More practice is obviously needed, but hopefully you get the idea.
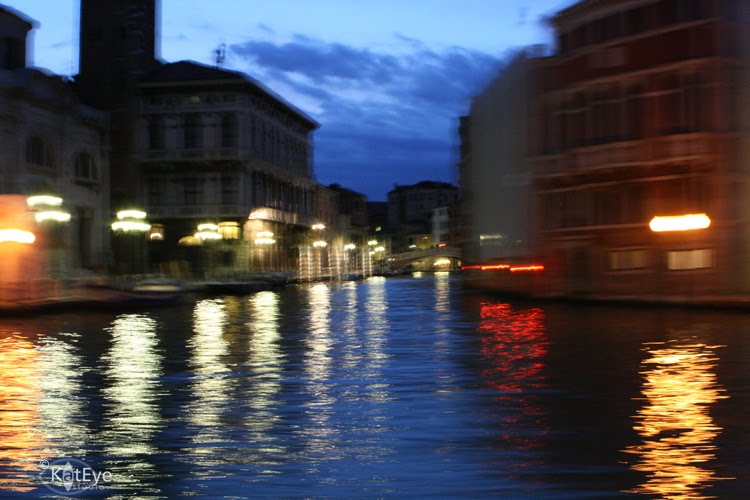
Sometimes, when you have just gone beyond the limits of any clear, in focus shot, just play. The photo below is from that same Vaporetto ride in Venice. Since I was moving on the boat, I played around with longer shutter speeds and intentionally moved the camera to get some cool effects. Kind of neat how the background buildings are still clear and “still” while the bright lights are moving – completely unplanned.
And finally, don’t be afraid of the dark. This is night, you can have large areas of your photo completely black and still have an amazing photo. Throw away the idea of the the entire frame being expo class=”separator” style=”clear: both; text-align: center;”>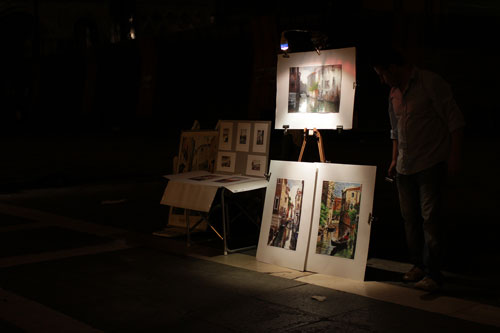


Glad to see you included good old London Town! I love the rainy pavement one and also the bookshop with the shadow person passing. It's like a ghost from one of the books – Jane Eyre maybe? The vaporetto ride image is wonderful; they look like lots of ticks – very stitchable. Cretan Stitch I think :-))
What gorgeous shots. Thanks so much for sharing all this and I'm looking forward to the newsletter. After reading your post, maybe I'll get over my fear of shooting at night and play with the settings you've suggested. I too, hate to carry a bulky tri-pod, especially on busy night life streets (Las Vegas). I'd love to be able to go down and shoot at night…now maybe I just will.
Thanks again for the tips.
Bright blessings,
Kathy
This post was very helpful and makes me look forward to getting some night time shooting in soon. I love your reflection photos!
You night potos are some of my very favorites, they are stunning.
YAY! I love this theme! Thank you! Your shots are gorgeous, as always, and thanks for the tips.
these are amazing.. my favorite is the one with streetlights and glow on the sidewalk from the rain, WOW! I have been wanting to get a tripod, just haven't had the time to check them out, I did order one for my iphone though!!
Your night photos are great! Thanks so much for doing this post! I have been wanting to learn more about night photography and have been playing around but have not been very successful! Now I can't wait to try again!
Hi Kat, I printed already printed the gift you sent me. Thanks!! Looking forward to the weekly news ^_^ Happy weekend!
I love your night time photos- I particularly love the blue ones. Stunning.
Great fun! I submitted a link for the first time. Night photography is tough but can be quite rewarding.
Great shots. Thanks for hosting 🙂
Great tutorial. As I was looking at your photos from Split I thught: this looks like Croatia. And then I read it is. Did you stop in Slovenia too?
Kat, I want to know how to set the white balance, and on my Canon the modes.
I have been taking sunsets and all of the pictures came out orange/yellowish. Finally I put it on mode night portrait and that improved things because it chooses everything for you. But you can not have on my camera aperture mode and night portrait mode at the same time.
Thanks for getting me going on the night photography.
Thank you so much for all the wonderful tips that you share.
BTW, I love the photo with the "moving" lights.
Halie